-
-
Suite of the month -Turtle- Awesome Suite
Every Month I will now be Doing a suite of the month where I will […]
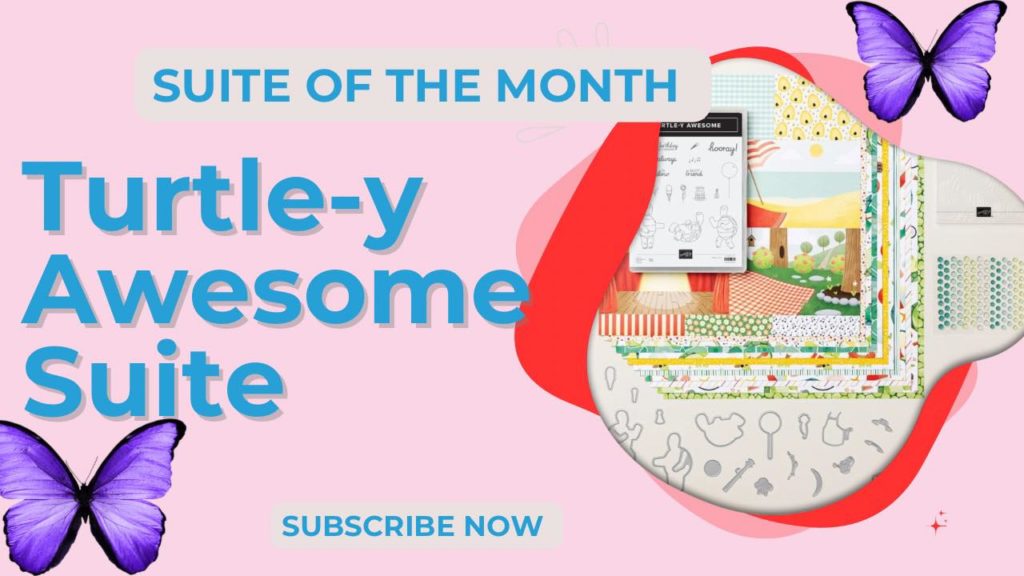
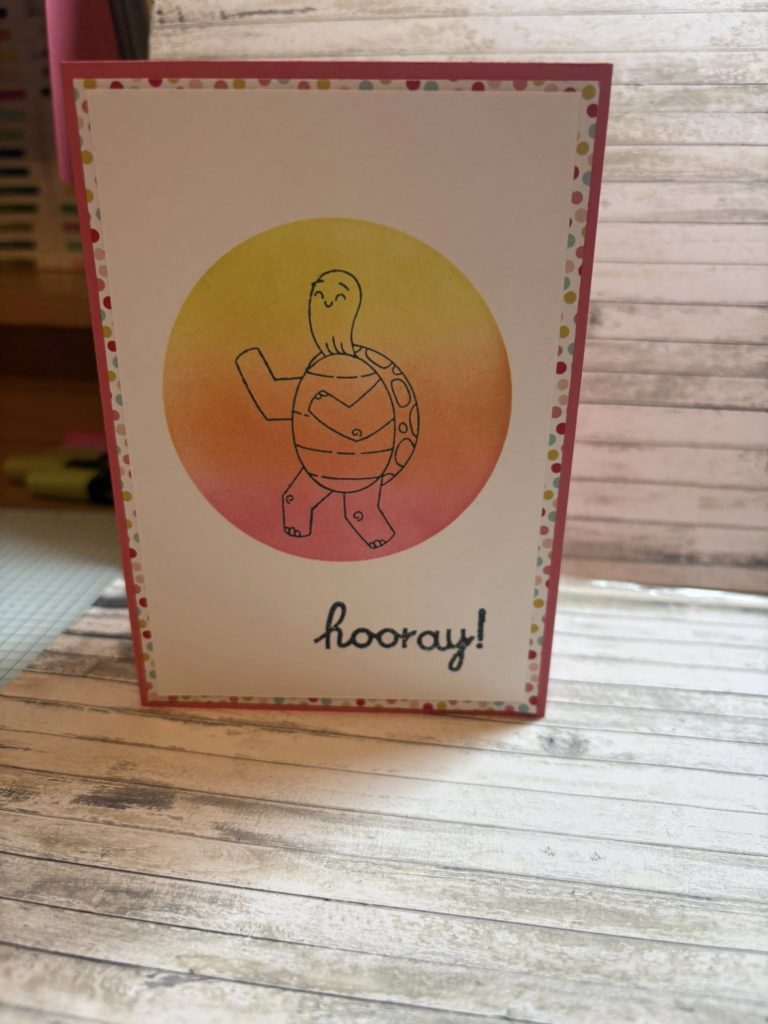
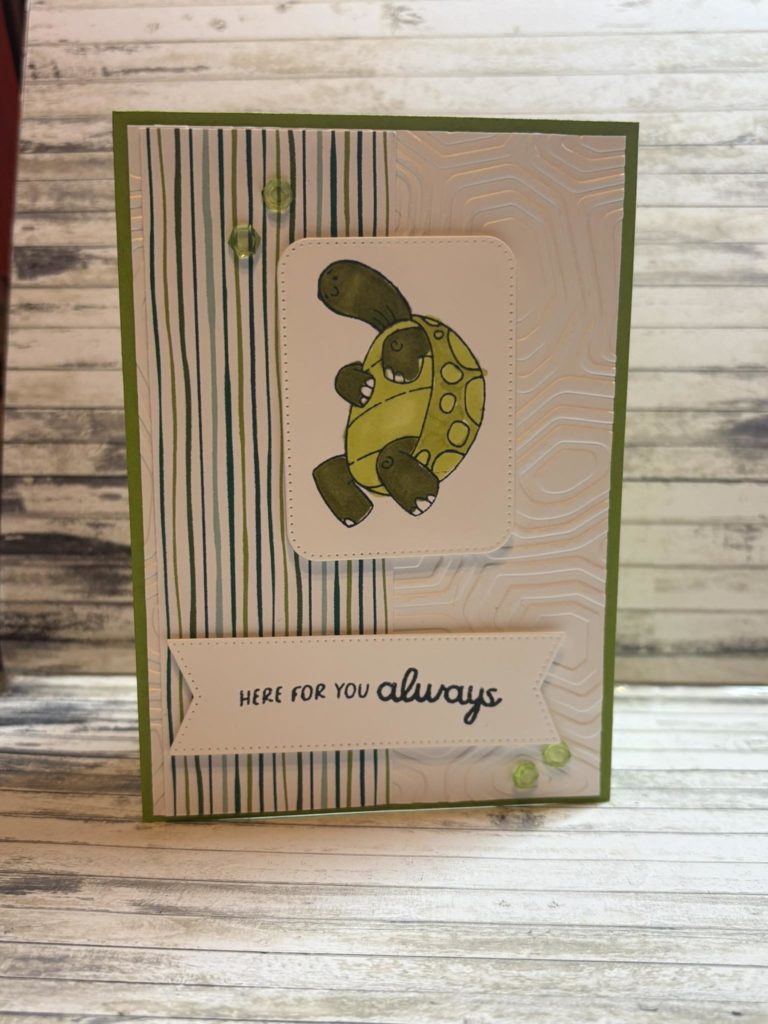
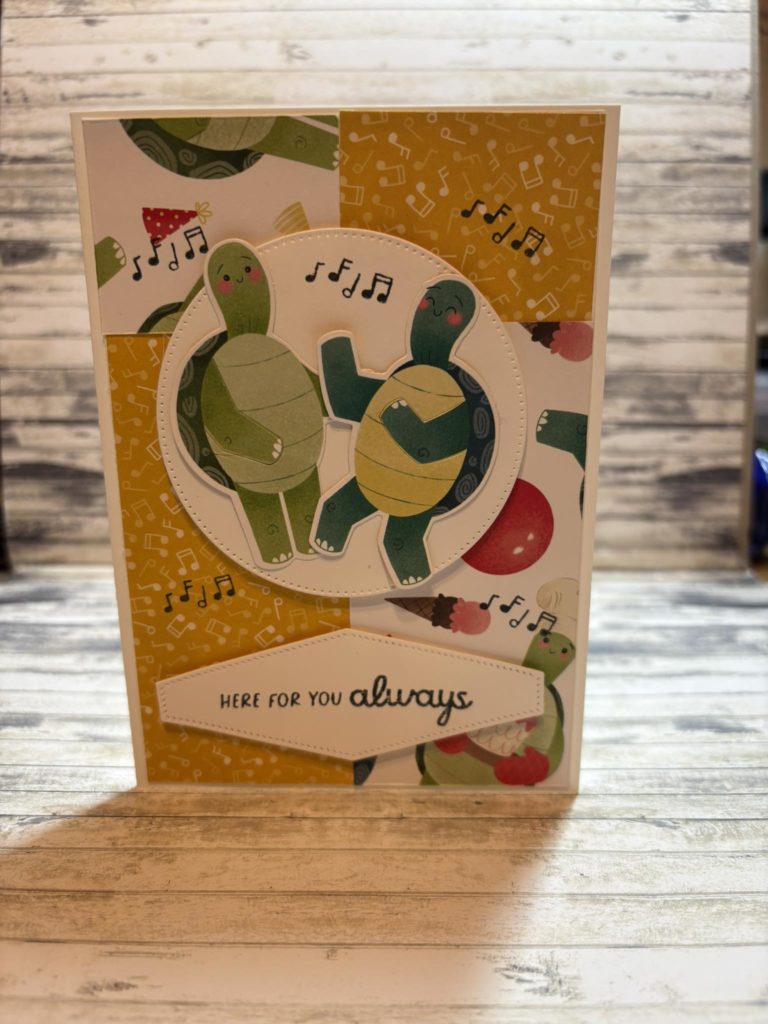
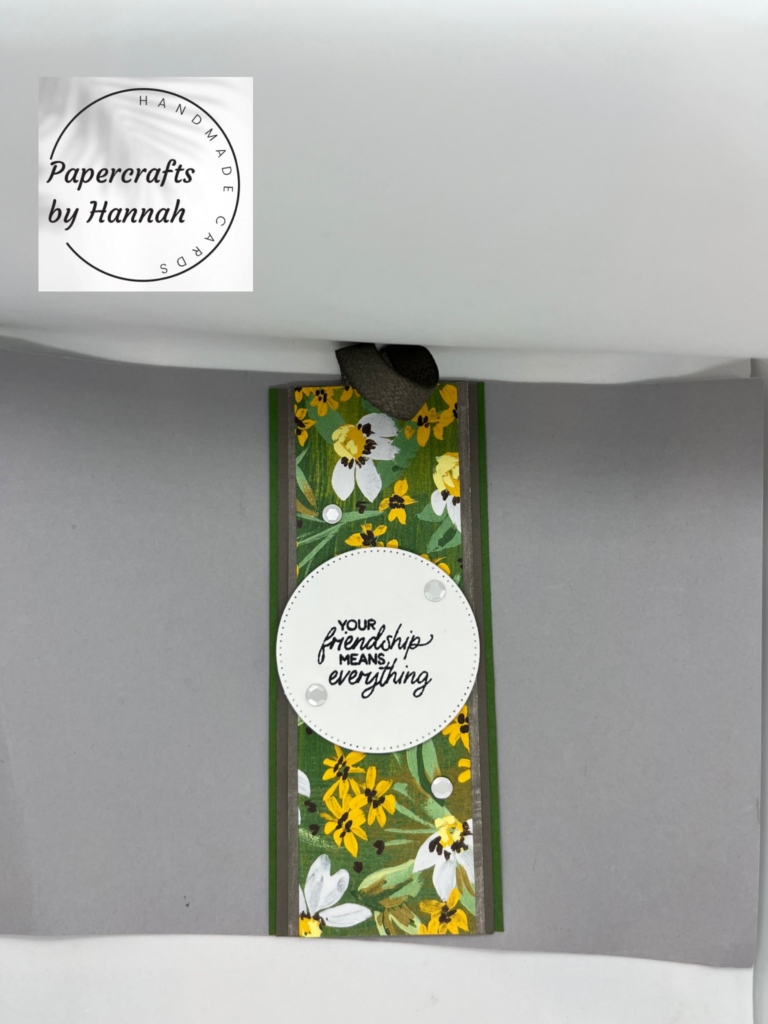
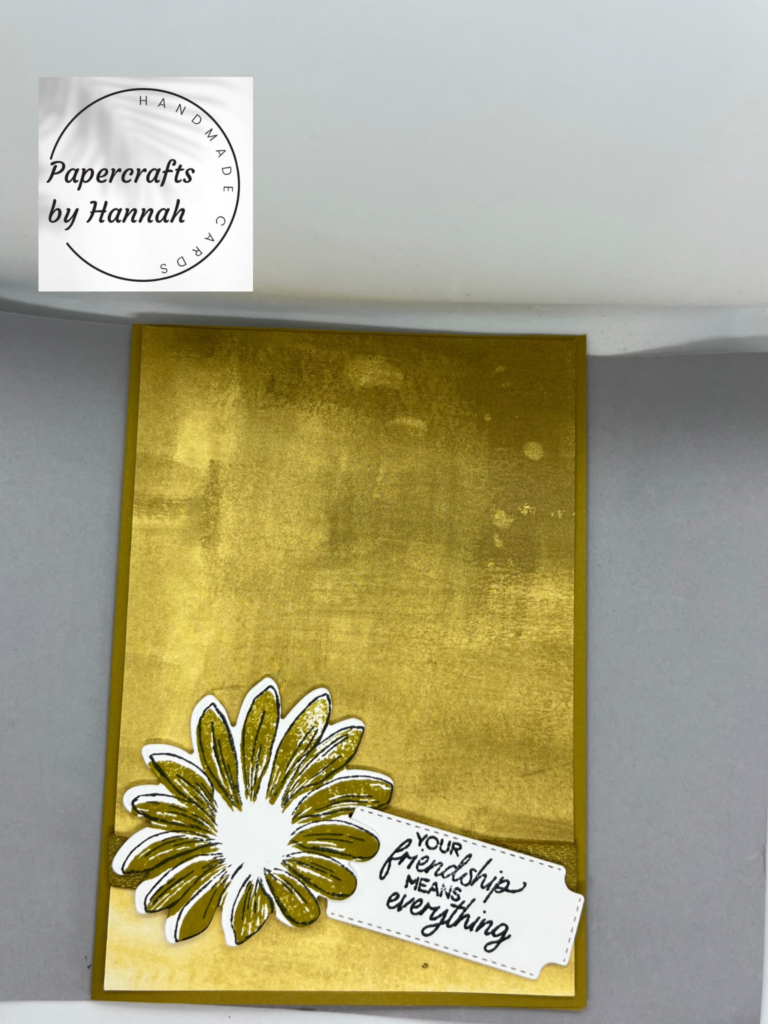
Every Month I will now be Doing a suite of the month where I will share 4 or more cards on how to do different techniques using the suite . This month suite is the Turtle-y Cute suite .
In this suite you will get:
Turtle-y awesome Stamp stamp set
Turtle-y Awesome Dies
Turtle Texture Embossing
Shades of green hexagons
Turtle-y cute 12 X 12 DSP
You can can get this suite using the code 165235 or you can get them all separate .
I have created 4 cards and a PDF to go along with it where you be able to download and able to use to make the cards all I ask is that you do not Sell the tutorial on or copy and claim the tutorial as your own.
Grab your PDF here
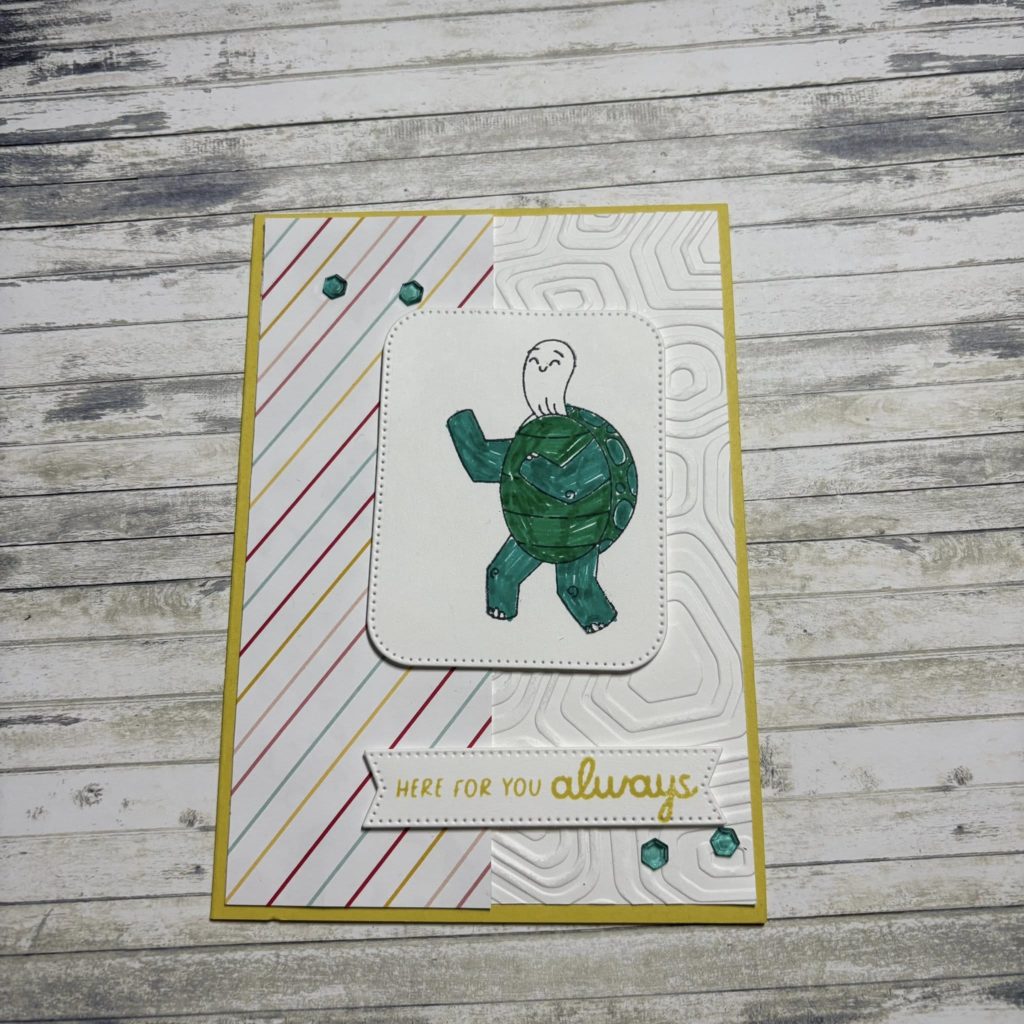
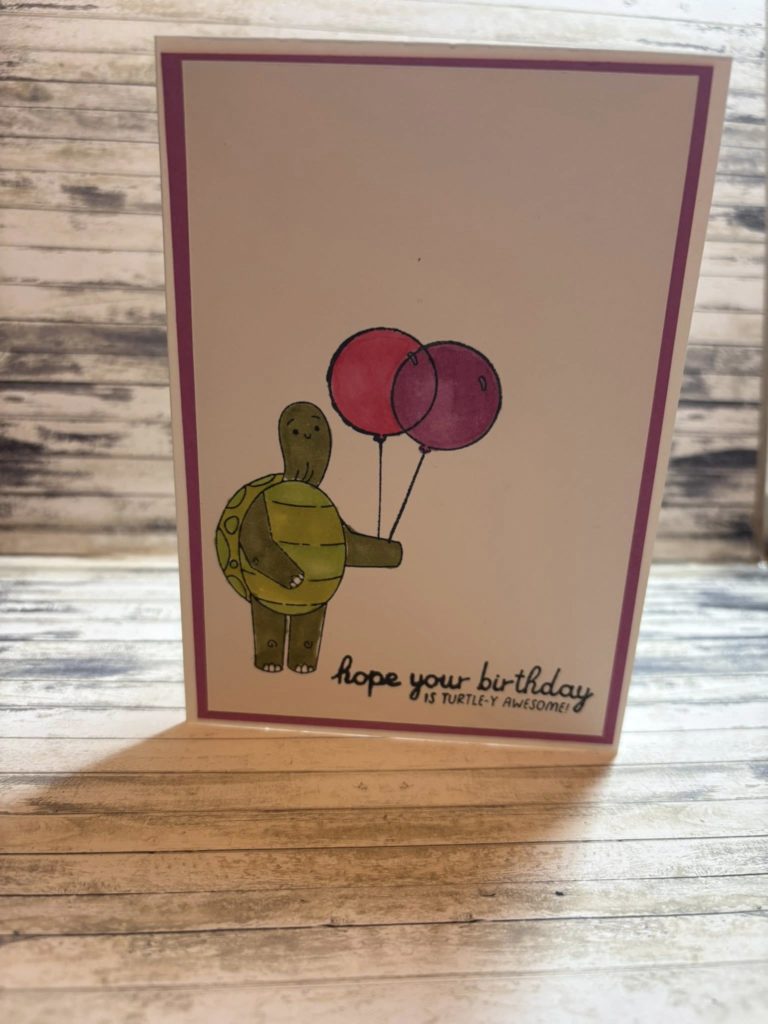
I have done some techniques doing die cutting , Masking and blending brushes along with Embossing and standard cutting .
I have attached the YouTube video below as well but also check out my YouTube for more cards using this suite as well.
Here are the cards using this suite for you all to see
Thank you for reading please feel free to leave a comment . See you next time on another blog
- Suite of the month -Turtle- Awesome Suite
- New Stampin’ Up! Reward Programme
- Sale A-Bration is nearly over
- Heartfelt Hexagon – Simple cards
- Time for Sale -A-Bration
-
New Stampin’ Up! Reward Programme
Shopping at stampin’ Up! Have got a little bit more rewarding Because you as customers […]

Shopping at stampin’ Up! Have got a little bit more rewarding Because you as customers can now earn even more rewards for shopping with me . You will earn rewards everytime you shop which you can save and if there is a big product you would like you can use the rewards on that or use them here and there on little items .
The way it works is
Shop- Create a Stampin’ Up! account, opt in to Stampin’ Rewards, and start shopping!
Earn- For every online order over £20*, you’ll earn 10% of your entire order in Stampin’ Rewards!
Redeem-Redeem your rewards and save BIG!
Here are some Frequently asked questions
- What is the Stampin’ Rewards programme?
- The Stampin’ Rewards programme is a way for you to earn rewards when you shop on the Stampin’ Up! website. You can use these rewards to redeem Stampin’ Up! products.
- How does the Stampin’ Rewards programme work?
- If you want to participate in the programme, you must sign up for a Stampin’ Up! online account. For every online order over £20, you’ll earn 10% of your entire order* in Stampin’ Rewards. You can view your rewards in your Stampin’ Rewards Dashboard, and you can redeem your rewards for products on the Stampin’ Up! website.
Check out the Video below from the CEO sara Douglas to find out more .
- Suite of the month -Turtle- Awesome Suite
- New Stampin’ Up! Reward Programme
- Sale A-Bration is nearly over
- Heartfelt Hexagon – Simple cards
- Time for Sale -A-Bration
-
Sale A-Bration is nearly over
Hello Everyone and welcome to another blog post .We are a few days a away […]
Hello Everyone and welcome to another blog post .We are a few days a away of sale a0bration of being over so i thought I would like to share you a card i used with manly just sale a-bration items minus card stock and colouring tools,
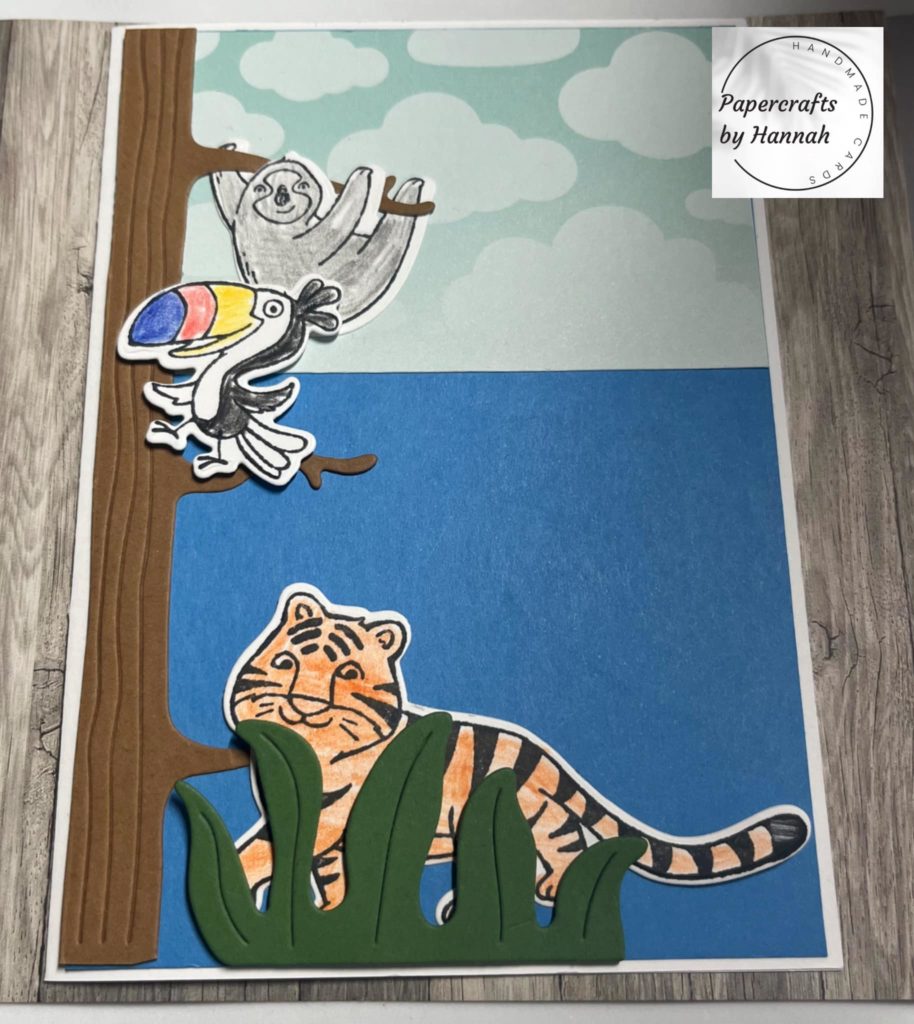
This card i created using basic white thick cardstock with azure afternoon and sunny days DSP. I cut of 3cm to make them look like clouds in the sky. I stamped the animals using jungle pals From the SALE-A-BRATION catalogue which also coordinate with the dies with i died cut the animals and the tree in pecan pie and the leaf in garden green.
There is lots of other products you can get free until 29th February 2024 at 10:59. There also a chance to join my team and get extra products in your starter kit or get a free glass mat and accessories.
shop any products by going to my shop and using the code CW4FGD6D to get a free tutorial sent to your inbox.
Thank you for reading please feel free to get hold of me for any questions you may have.
- Suite of the month -Turtle- Awesome Suite
- New Stampin’ Up! Reward Programme
- Sale A-Bration is nearly over
- Heartfelt Hexagon – Simple cards
- Time for Sale -A-Bration
-
Heartfelt Hexagon – Simple cards
Hello and welcome to another blog post for January and the very last one of […]
Hello and welcome to another blog post for January and the very last one of the month . This week we will be looking at the heartfelt hexagon stamp set and also the Heartfelt Hello which is a Sale-A-Bration stamp set and the punch.
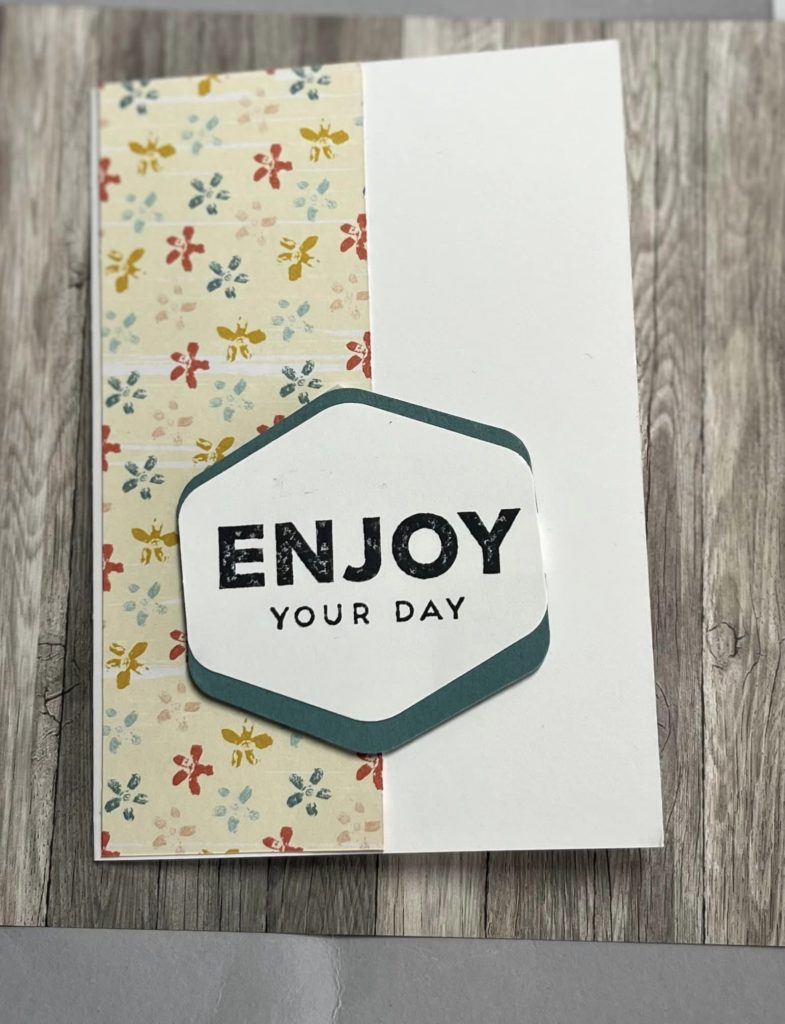
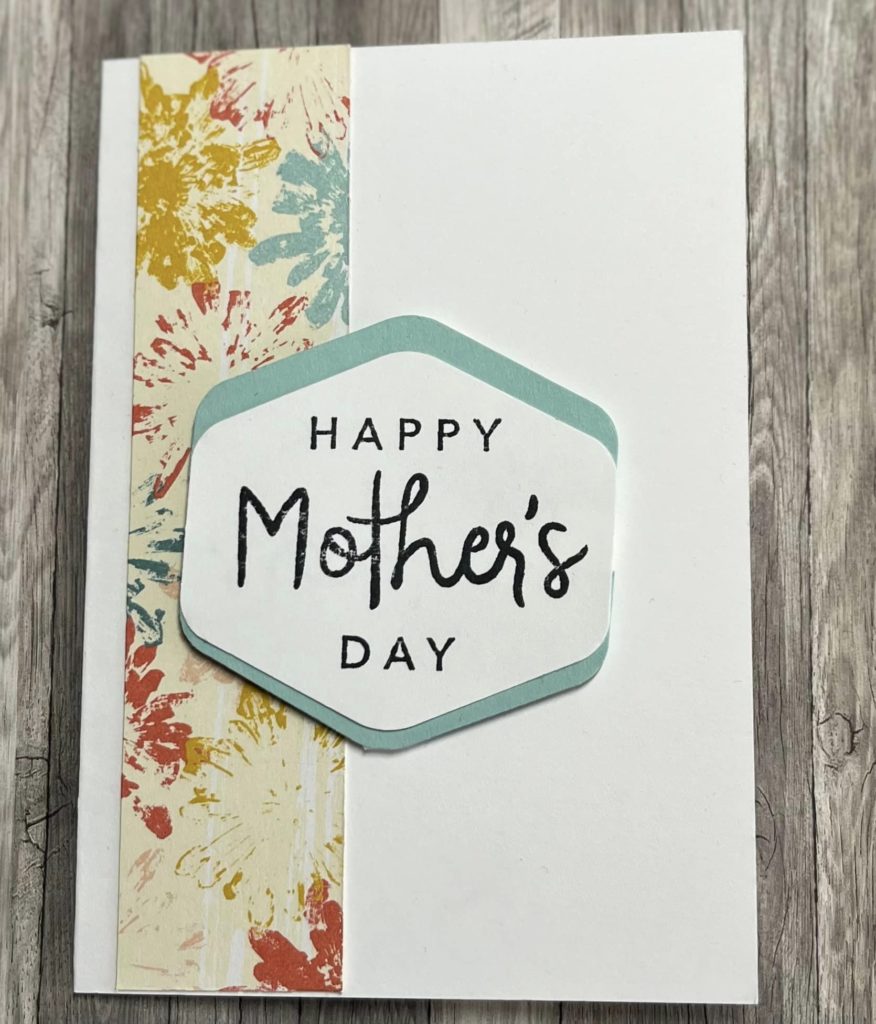
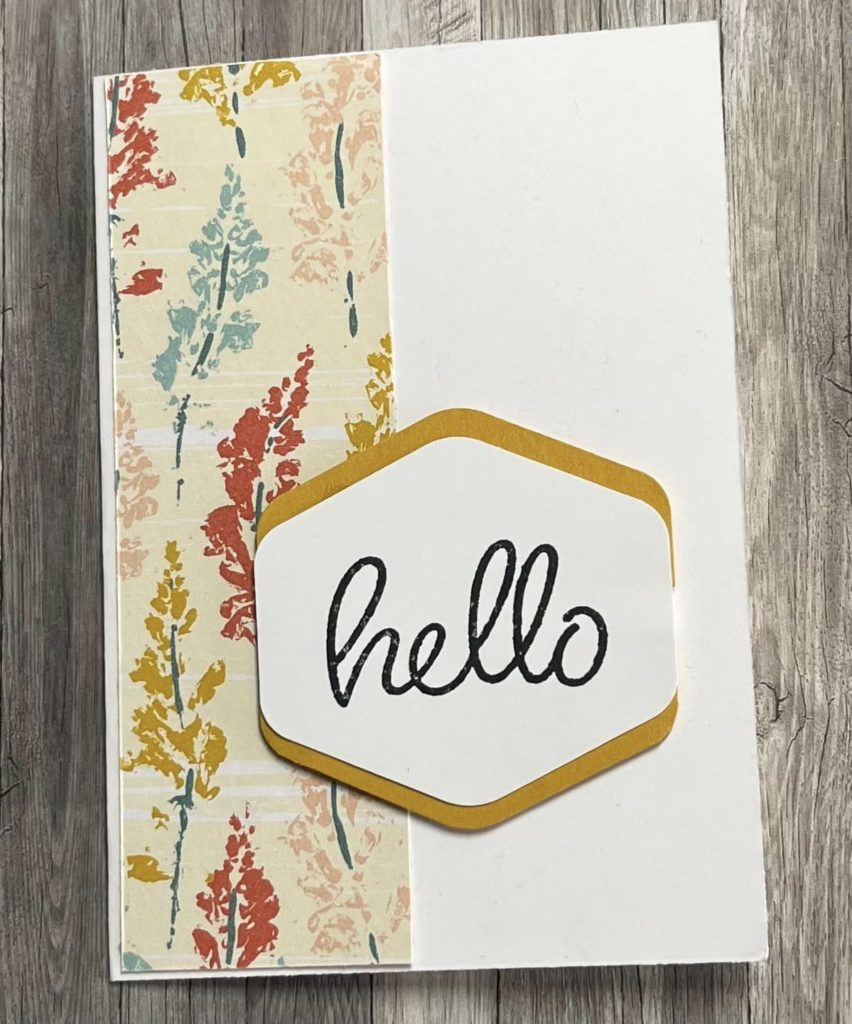
The first card i created was using the Basic white note cards .I made 3 the same but with different sentiments and colors which coordinate with the DSP . The DSP I have used is the inked botanicals 6×6 paper.
I stamped the Hello , Enjoy your day and happy Mothers day in memento on basic white and then punched out using the hexagon punch . I then punched out a crushed curry , lost lagoon and pool party card using the hexagon punched and cat the colored pieces in half and stuck it to the back of the white hexagon so it over lapse.
I then cut the dsp at 3 cm x 12.7 and 4 cm x 12.7 and 4.5 cm x 12.7 and stuck to the left side of the card near the fold . I then attached the basic white sentiments with the colored edging using the dimensional .
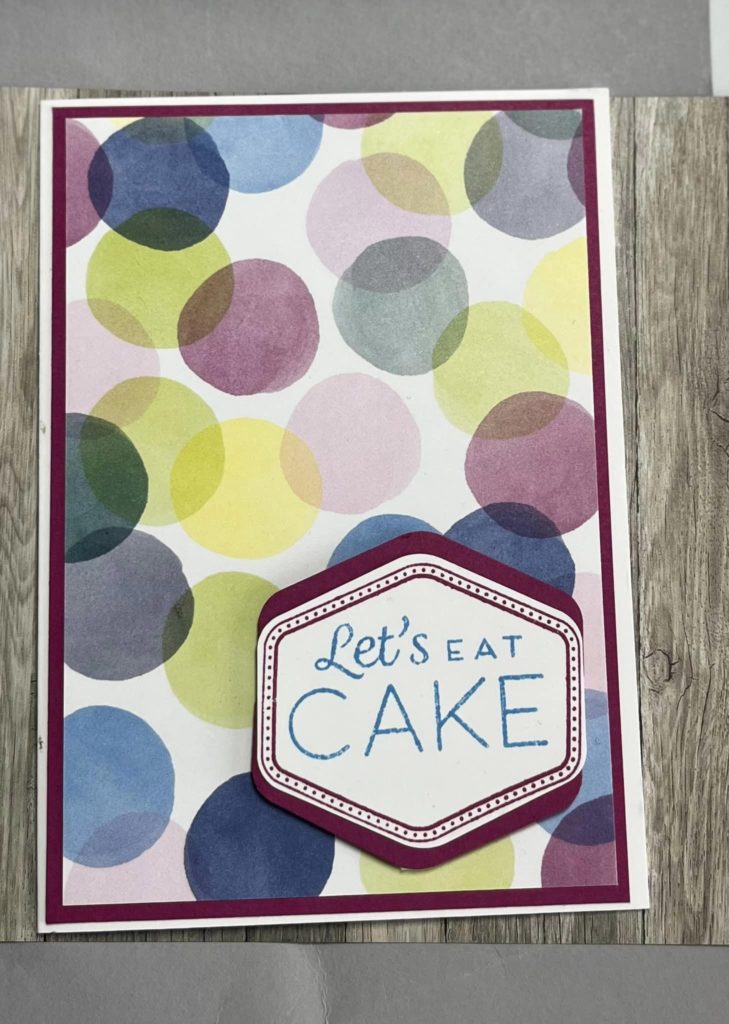
The next card i created with Basic white thick for the card base and berry burst for the second layer and the Birthday balloon spotty DSP as the third . I then punched out a hexagon in berry burst and stamp the basic white in berry burst outer border and the words in azure afternoon. I cut the berry bust card in half and attach to the back of the basic white.
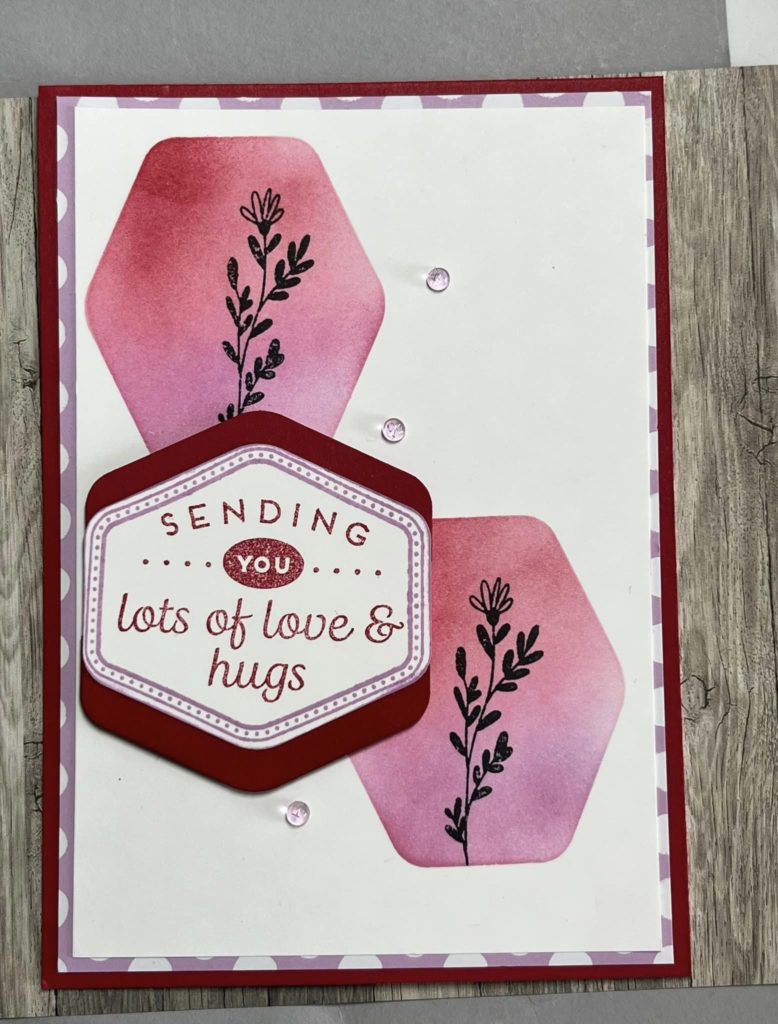
My final card i created was using real red for the base a fresh freesia dsp and basic white card stock . I first punched out the hexagon and placed it on the basic white and using the blending brushes and the ink pad i made the background in Real red and fresh freesia and stamped the leave in the middle on basic black .
I then punched out a real red hexagon and stamped the border in fresh freesia and the words in real red. I then punched out and cut the real red card in half and stuck to the back to leave a little bit sticking out.
Thank you for reading i hope you enjoyed if you want to order from me dont forget to go to my store.
- Suite of the month -Turtle- Awesome Suite
- New Stampin’ Up! Reward Programme
- Sale A-Bration is nearly over
- Heartfelt Hexagon – Simple cards
- Time for Sale -A-Bration
-
Time for Sale -A-Bration
Hello Everyone and welcome to another Blog this week we will be looking at some […]
Hello Everyone and welcome to another Blog this week we will be looking at some Sale-a-bration items which is using the softly stripped dsp and the softy sophisticated stamp set and the coordinating Embossing folder.
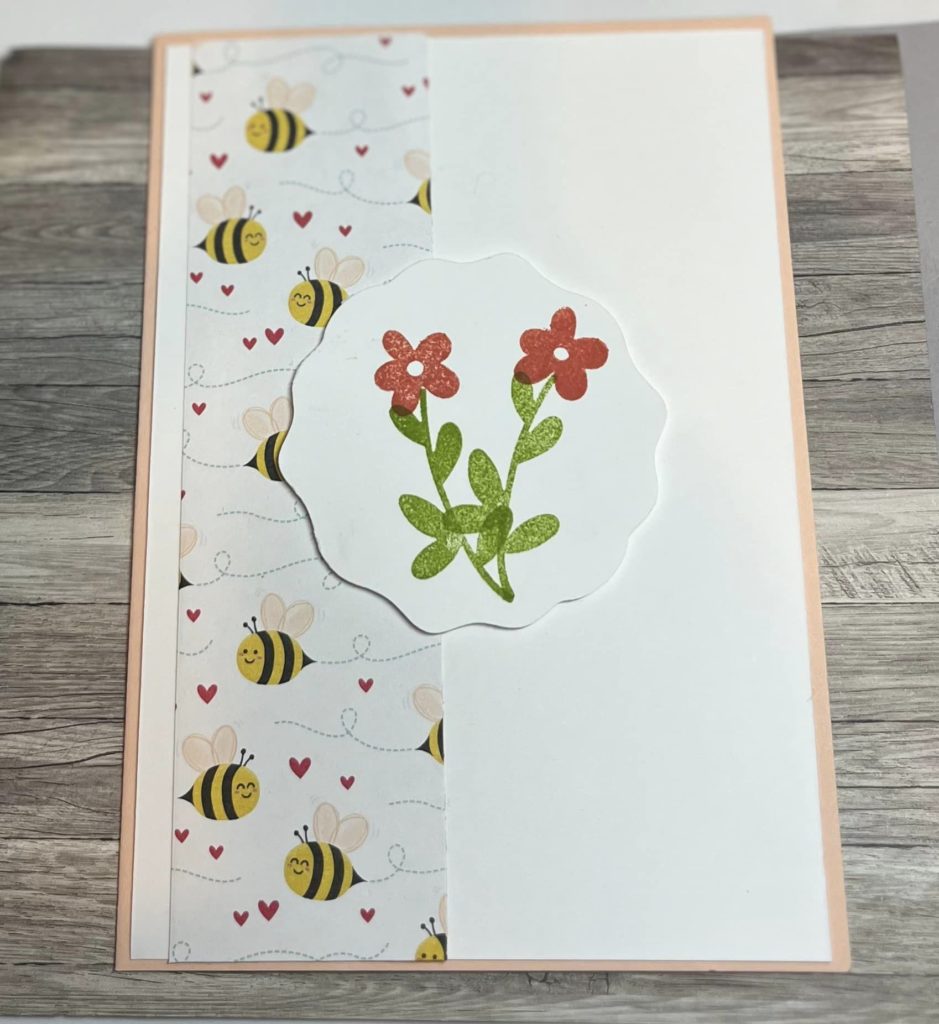
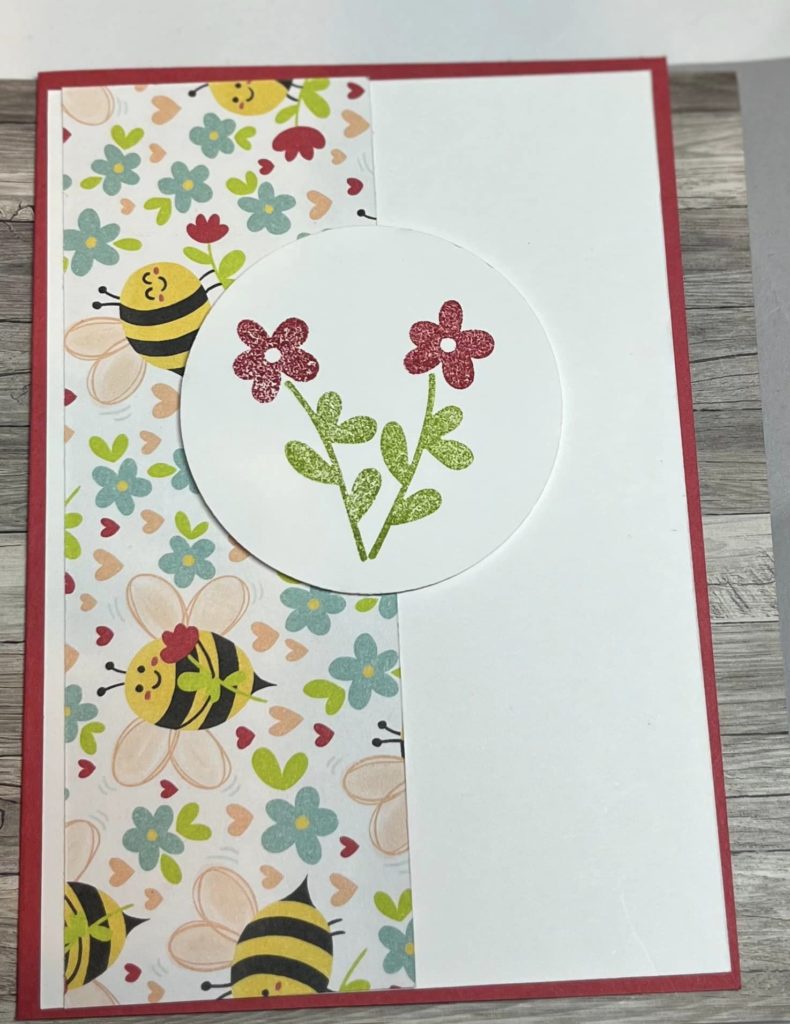
The first card I made was using the pool party card stock and cut 3 cm off the side once scored at 10.5 . I cut a 9 x 9 cm pool part and embossed it using the coordinating embossing folder. I cut the basic white at 8.5 cm x 8.5 cm and stamped the worlds in pool party and the flowers in garden green and real red. I cut the dsp at 6.5cm x 13.9 cm and attach all together .
The second cards I made using the Calypso Coral card base ,Basic White and the DSP which i cut diagonally both ways and turned 2 of the Pieces over, I then stamped the words in calypso coral and the flower in Garden Green and Real Red and die cut using the postage dies .
The next 2 cards are examples that of 2 that I Made on my video which i have attached to the bottom of the page but in different colors but same layout.
Thank you very much for reading I hope you enjoyed don’t forgot if you would like to order go to my shop and order using the host code.
- Suite of the month -Turtle- Awesome Suite
- New Stampin’ Up! Reward Programme
- Sale A-Bration is nearly over
- Heartfelt Hexagon – Simple cards
- Time for Sale -A-Bration
-
Tech 4 Stampers BlogHop – Lets Celebrate
Good evening and Happy Tuesday and welcome to this month Tech 4 stampers academy Blog […]

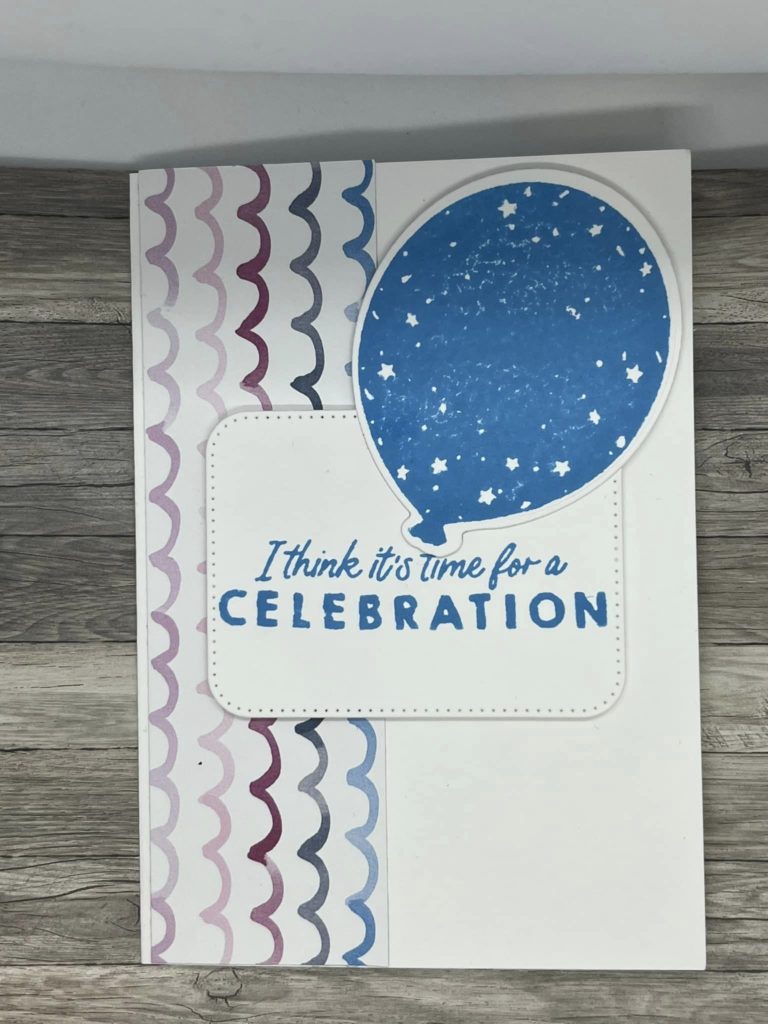
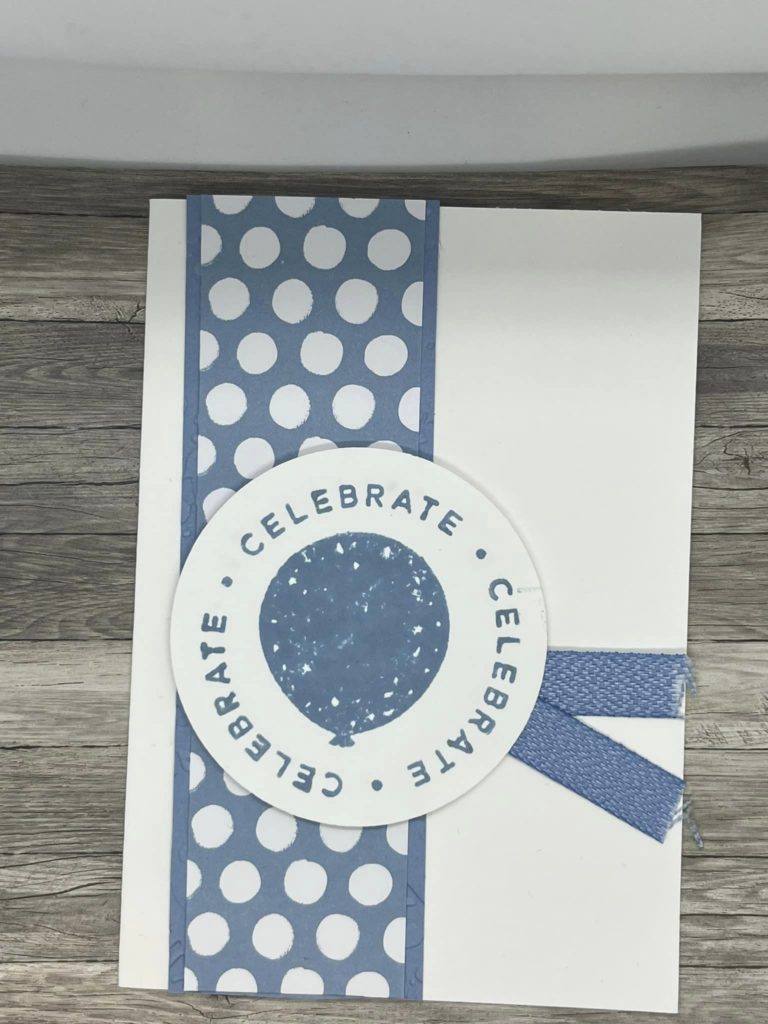
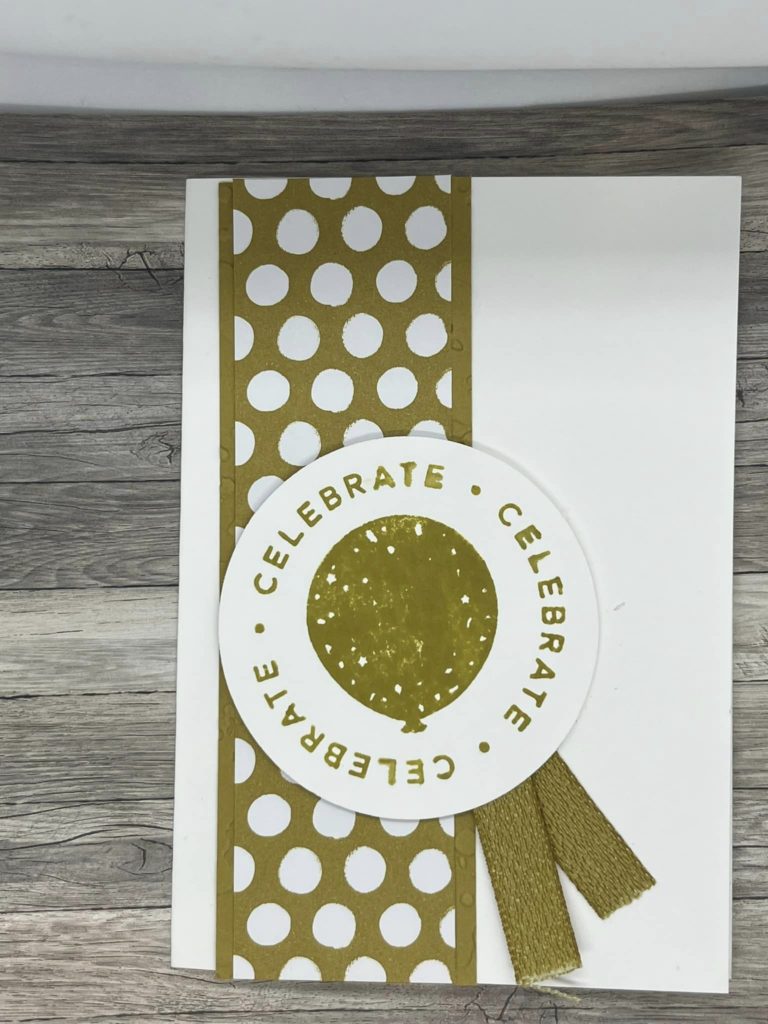
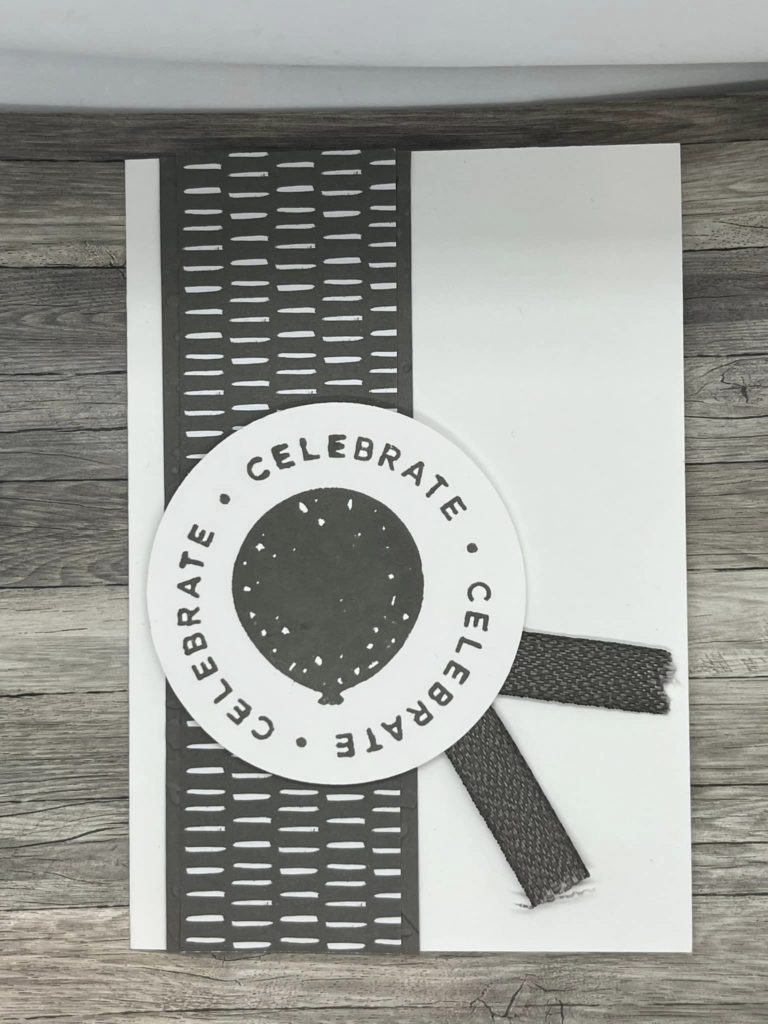
Good evening and Happy Tuesday and welcome to this month Tech 4 stampers academy Blog hop and the theme this month is Celebrate so i have crated a few cards using Circle sayings celebrate stamp and punch Birthday balloons stamps and dies.
My first card
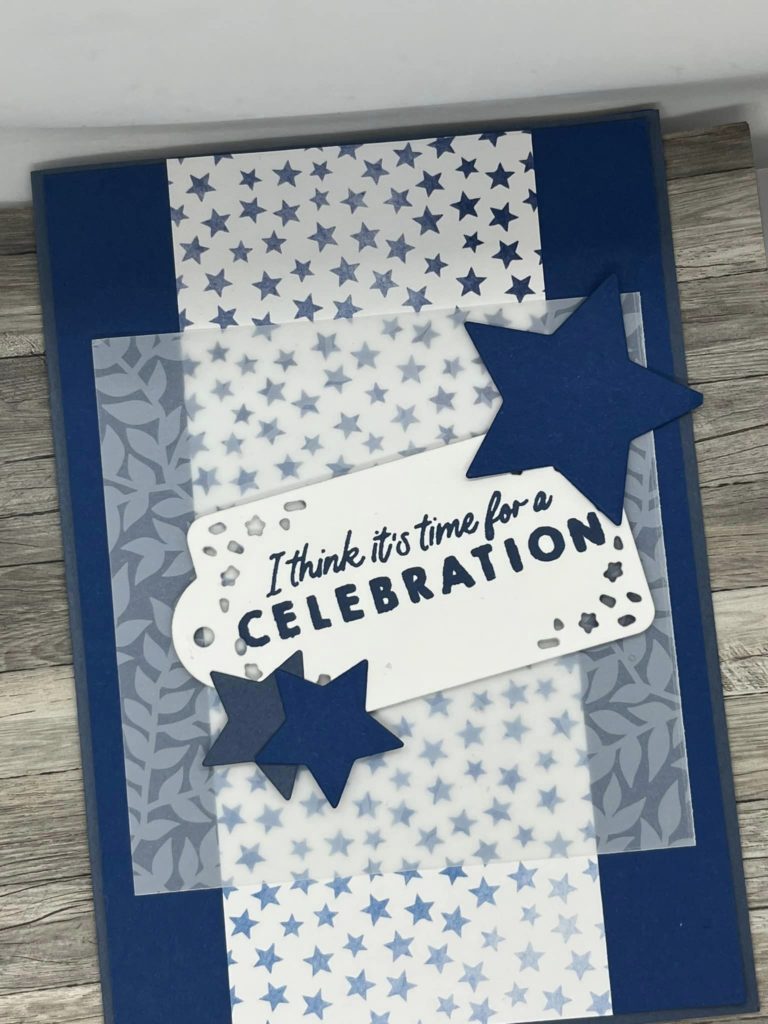
I created this card Using bright and beutiful dsp
Instructions
- Cut the Misty Moonlight card base at 20 x 14.9cm and score at 10.5
- Cut the Blueberry Bushell layer at 14.4cm x 10cm
- Cut the DSP 6X 14.4
- Cut the Vellum at 9×9 cm
- die cut the starts using the bright and beautiful dies and the tag from the same dies
- stamp the sentiment in Misrty moonlight and attach the card together .
This is My second Card is using the note cards as the base .
Thank you for taking the time to read if you would like to order then please feel free to contact me or go to my shop to order and if you order from you will get a free tutorial that has ideas from many people around the world .
- Suite of the month -Turtle- Awesome Suite
- New Stampin’ Up! Reward Programme
- Sale A-Bration is nearly over
- Heartfelt Hexagon – Simple cards
- Time for Sale -A-Bration
-
Out now
I am So excited to announce the new January – April Mini catalog is now […]
I am So excited to announce the new January – April Mini catalog is now out for you all to shop from
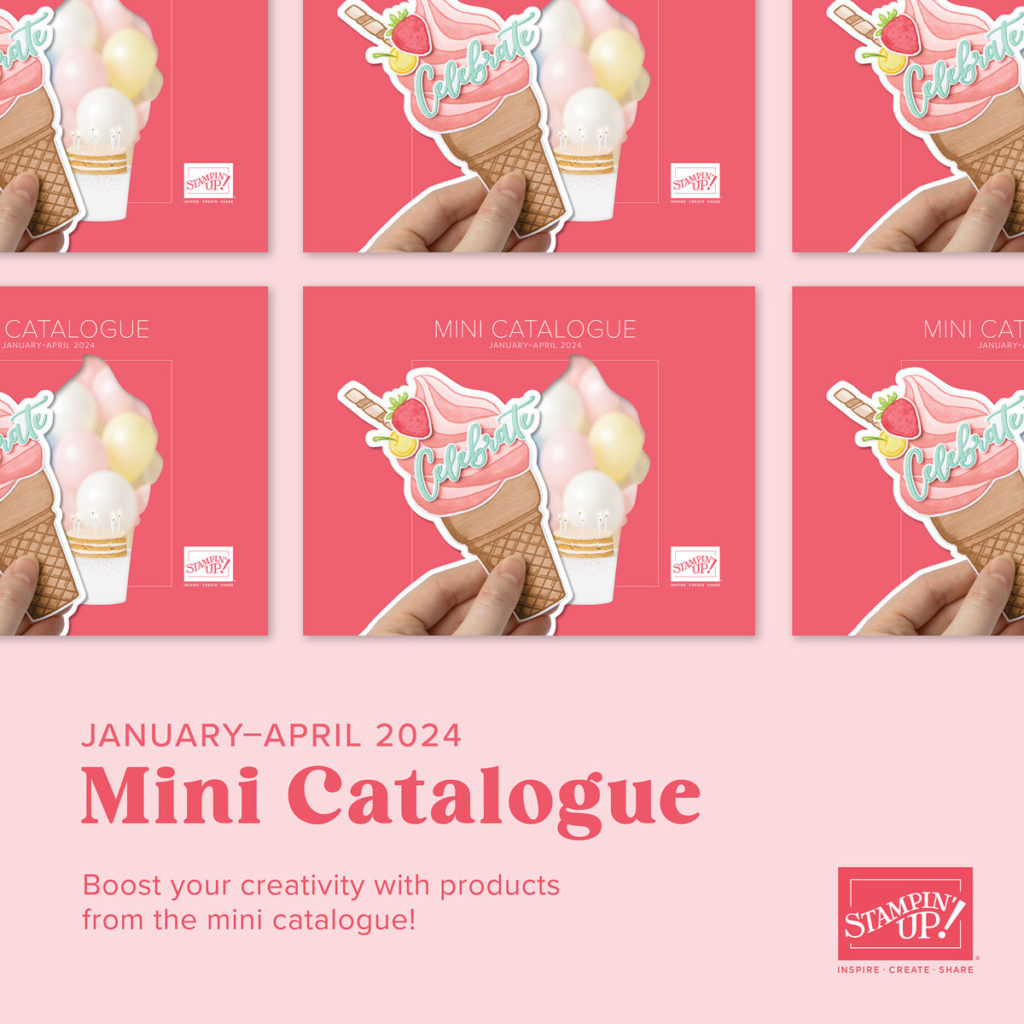
You can shop from me by going to my store https://www.stampinup.uk/?demoid=5016326
and using the host code BSCHQFEE

You can shop and earn free products if you spend £45 or £90 which you can get in the Sale A- Bration . You can also Host a party and earn free products when you order and also join my team as well and grab your self some extra product of the stamping glass mat and accessories

Here a sneak peak at the glass mat for you all and some information on it
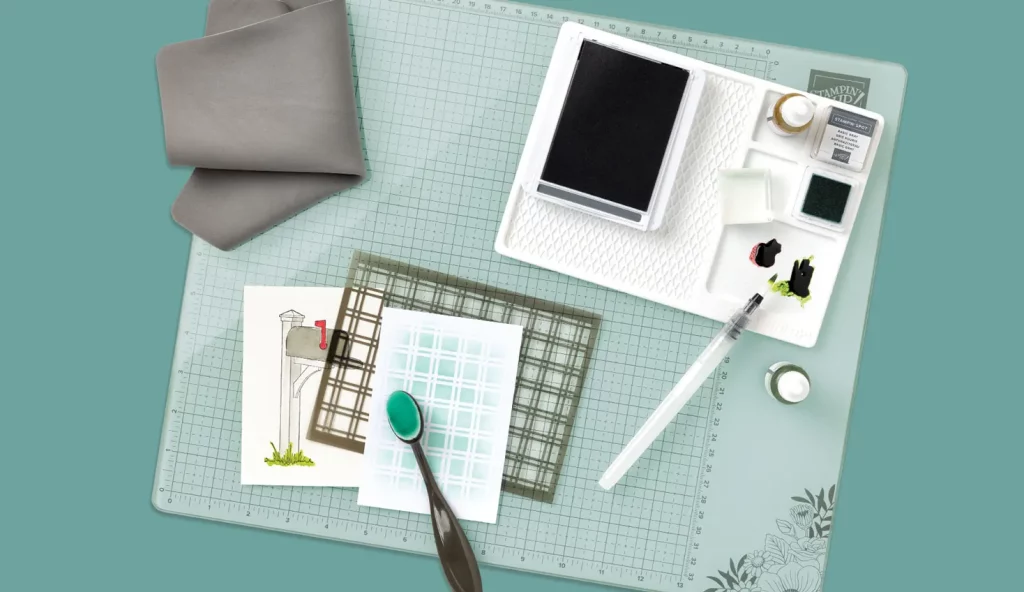
The Stampin’ Glass Mat Studio is a paper crafter’s dream! The heavy-duty glass mat comes printed with a ruler and grid lines for easy measuring, while the large surface space gives ample room for spreading out while paper crafting. The safety-tempered glass has a heat and scratch resistant surface that wipes clean with the included cloth and water—no chemicals needed. The reusable cloth also cleans ink off your stamps! The nonslip, heat resistant, waterproof silicone mat features four palette squares for mixing custom ink colours or for holding small ink spots in place while crafting. Each component can be used separately or you can use all three items together for a multipurpose paper crafting studio that’s both functional and elegant.
The glass mat studio includes the glass mat which 5mm thick , Heat and screatch resistant And you can clean it with water or alcohol to keep it clean
There a silcone mat included which can stick to the mat and perfect for watercolor holding the mini ink that you get with the kits waterproof and heat resistant
It also comes with a cleaning cloth which is durable and reusable and perfect for cleaning stamps and surfacing with just water .
so if you like to get a chance of grabbing on then join my team by using this link https://www.stampinup.uk/join?demoid=5016326
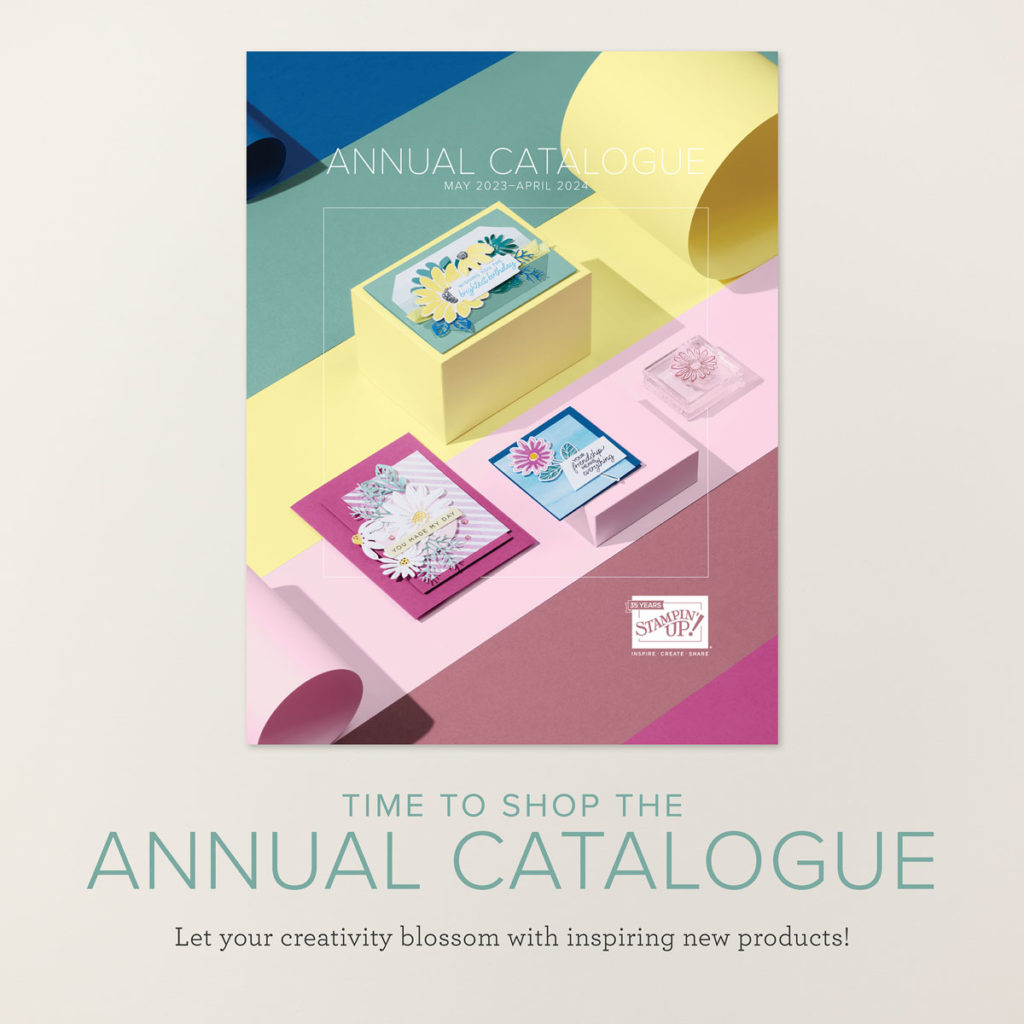
But don’t forget the annual catalogue is out now which you can also buy from aswell.
If you have any questions then please feel free to contact me and I will be happy to answer any questions that i can
- Suite of the month -Turtle- Awesome Suite
- New Stampin’ Up! Reward Programme
- Sale A-Bration is nearly over
- Heartfelt Hexagon – Simple cards
- Time for Sale -A-Bration
-
Bee My Valentines – Simple cards using Bees
Hello and welcome to another Blog post I know it has been a while I […]
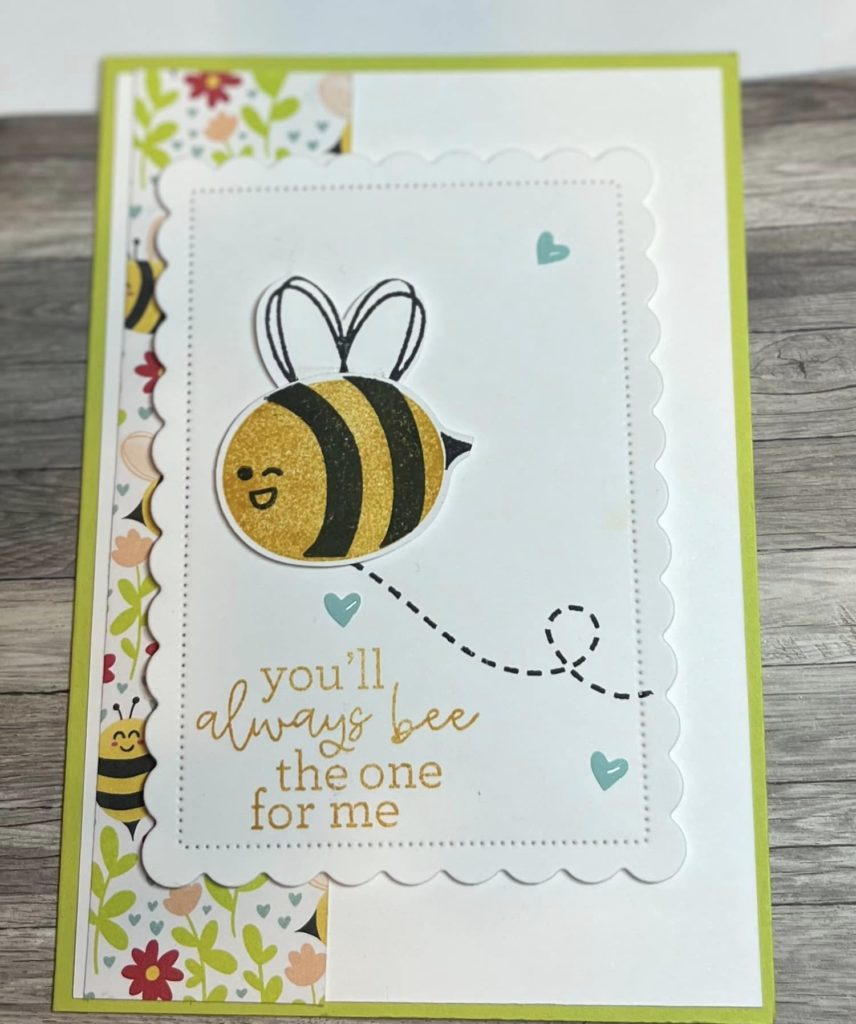
Hello and welcome to another Blog post I know it has been a while I will get more frequent at doing theses . This week we will be looking at the Bee my Valentines suite and in this suite we have a Stamp set and with a punch , Designer series paper also known as DSP ,Some Sweet Sorbet Ribbon ,some adhesive hearts and flowers and square pillow boxes.
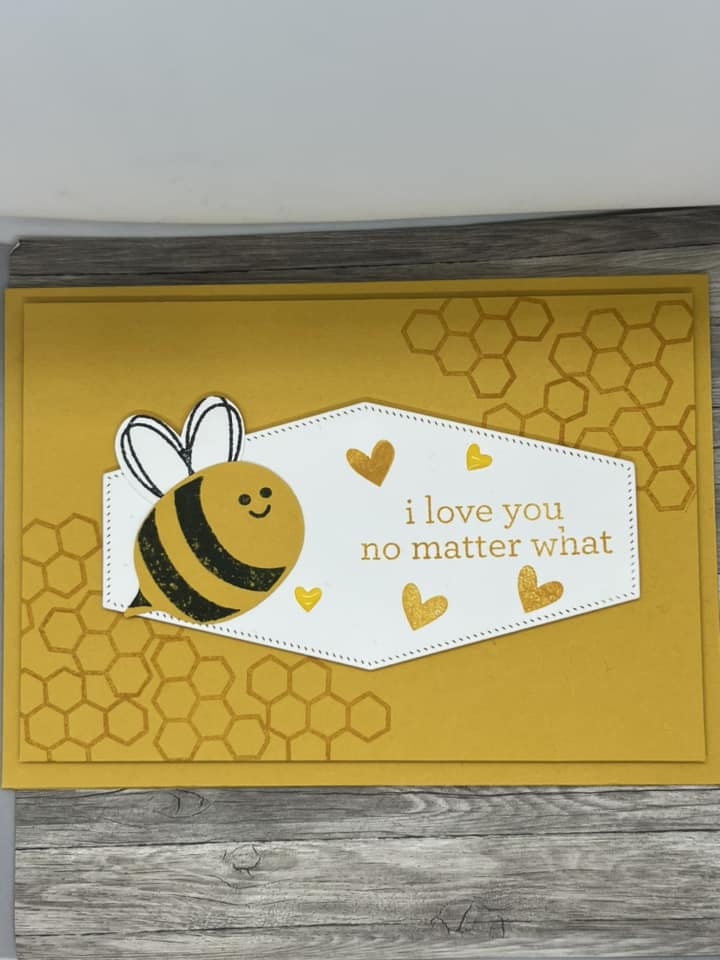
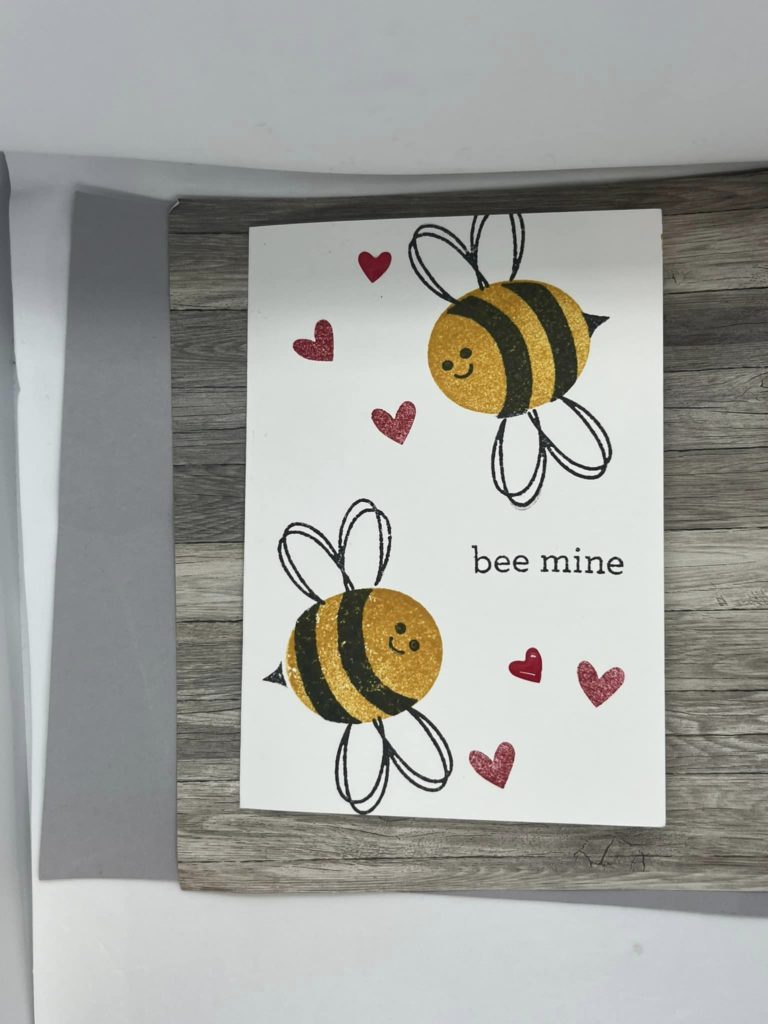
My first card I have cased a catalogue The card stock I used was Crushed Curry and crushed curry ink . I then stamped the bee on Crushed curry using memento and then punched the bee out and the wings in memento and used the punch to punch the wings . and then glued it all together
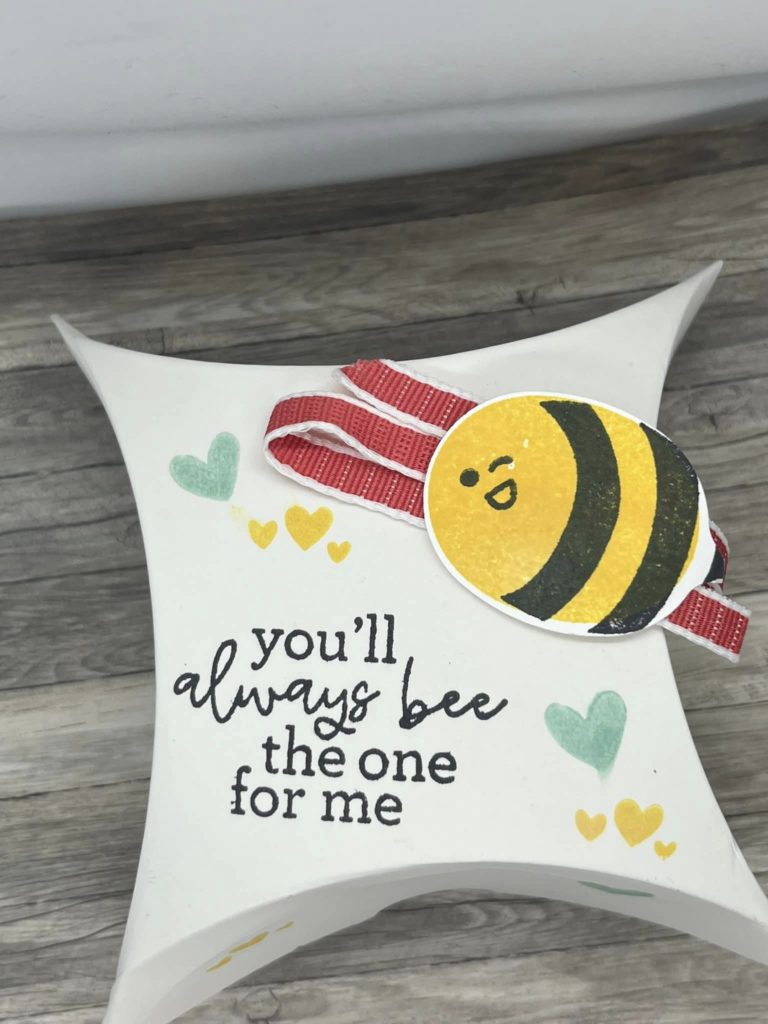
I then Used the Square pillow box which I decorated using pool party and daffodil delight ink and then stamped the bee and punched out.
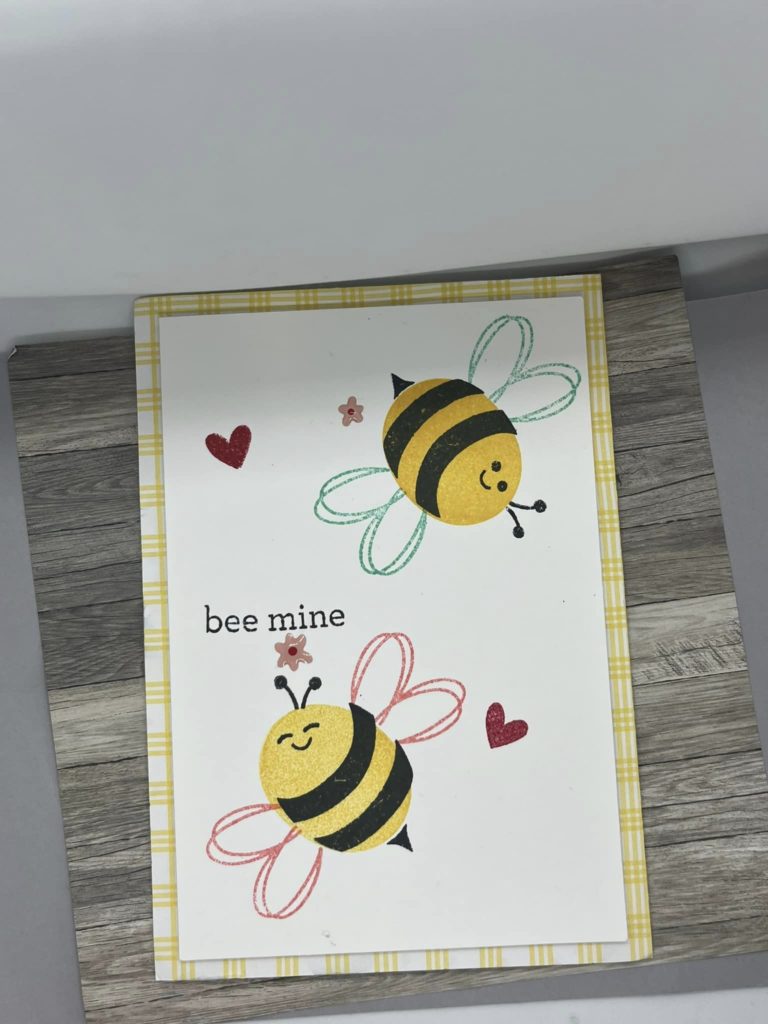
My Next card i made using the Be mine 12×12 DSP and some basic white card stock I cut the DSP at 14.9 x 10.5 and covered and the basic white dsp at 13.9 x 9.5 cm and stamped the be using crushed curry and memento with balmy blue wings and Real Red wings and stamping 2 red hearts and add then flower adhesive backed gems.
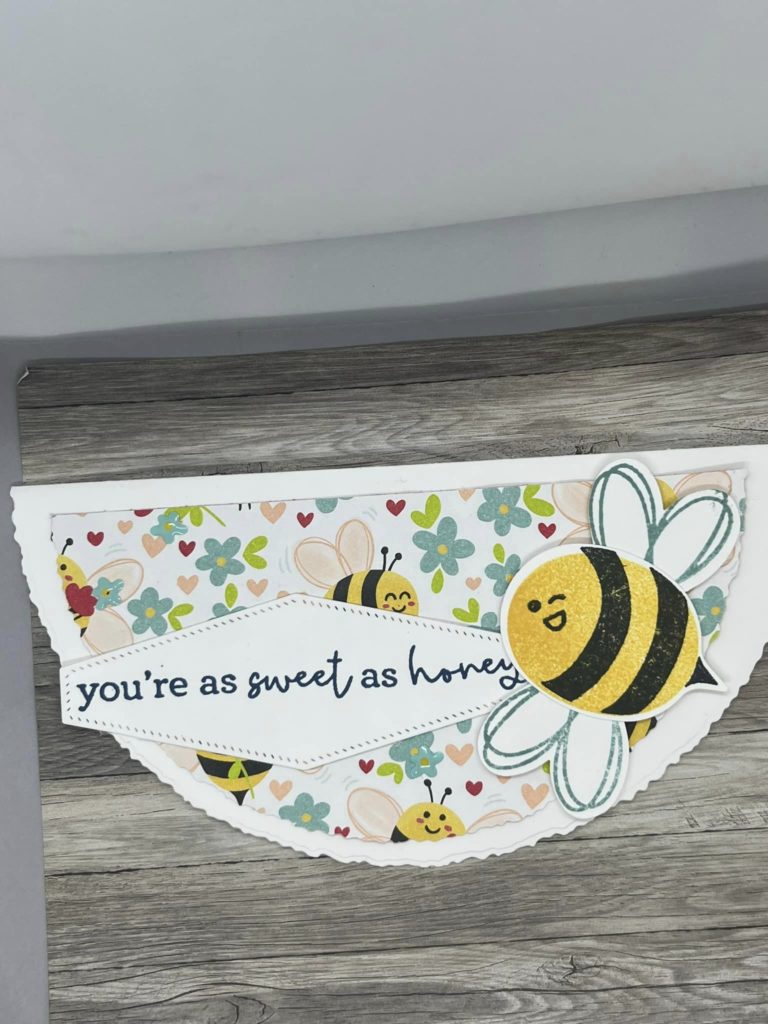
The last cards I made was using the largest circle dies and folded in half and then the 3 smallest from the largest circle and cut in half and .I stamped the bee in Crushed curry and memento and stuck on the card before adding sentiment using the
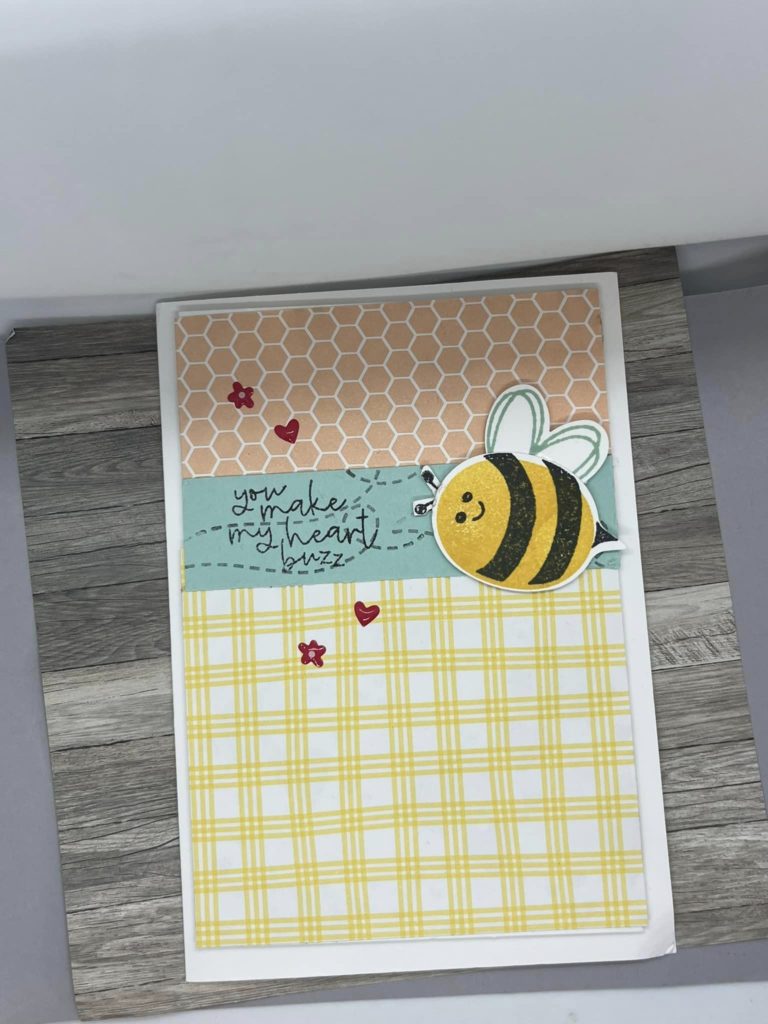
The next 2 cards I created at Onstage a demo only event using the suite .

The last card i made using the note cards and enveloped and just copied a card i made and showed you how to make a little further up on this post .
These are the photo i made on my video

Thank you for taking the time to read about this suite and if you would like to order then please feel free to contact me or go to my shop to order and if you order from you will get a free tutorial that has ideas from many people around the world .
- Suite of the month -Turtle- Awesome Suite
- New Stampin’ Up! Reward Programme
- Sale A-Bration is nearly over
- Heartfelt Hexagon – Simple cards
- Time for Sale -A-Bration
-
Happy New year – Great news
Happy New Year Everyone I hope you had a wonderful start to the new year […]
Happy New Year Everyone I hope you had a wonderful start to the new year . I thought I would let you know of some changes Happening in 2024 with Papercraftsbyhannah . The first is For the next year i will be taking part in a Tutorial Bundle where I have Collaborated with 10 Other demonstrators from around the United Kingdom , Australia and United states. This tutorial is free with any Order you have placed
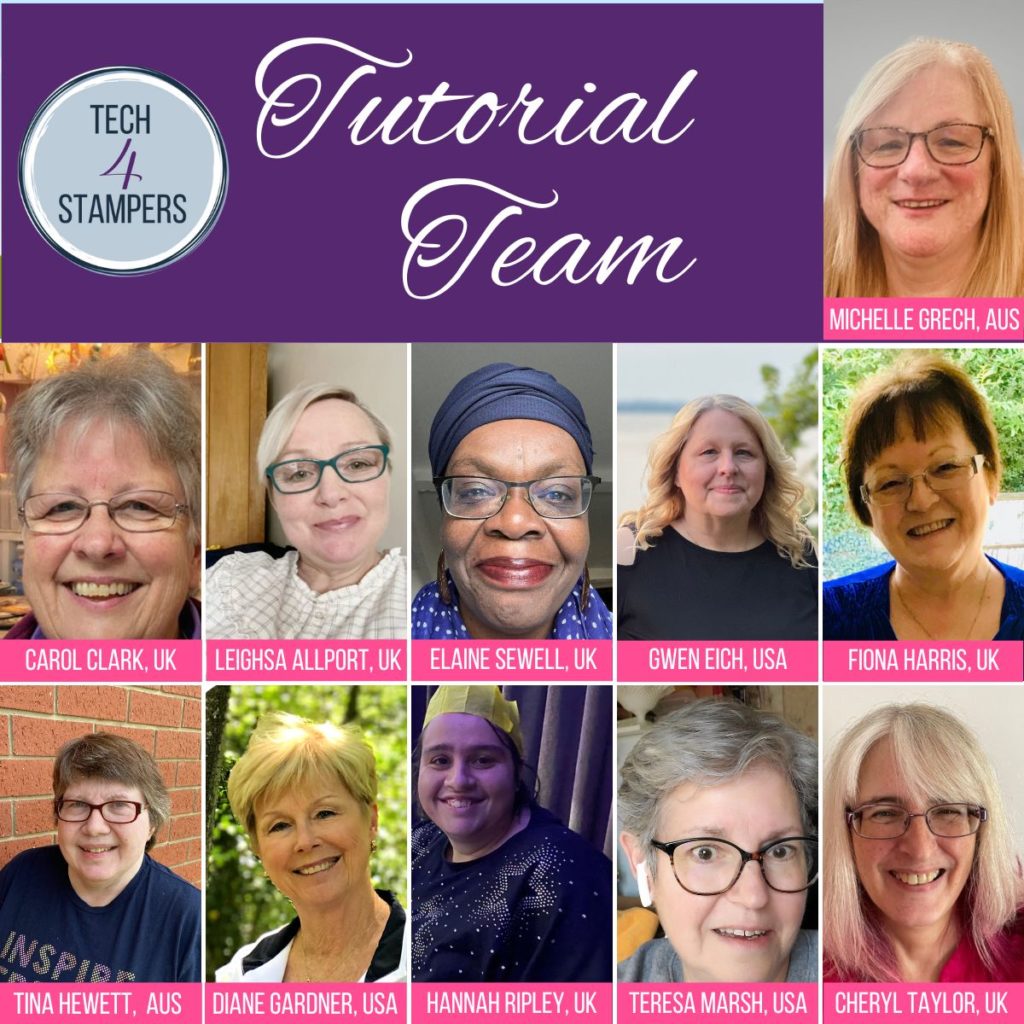
You can grab your Free tutorial with all 11 in by Placing an order with me and using the Host code BSCHQFFE. January Theme is Hello So why not Make an order to check out all the amazing projects. There will be a new tutorial every month .
When you have ordered and recieved the tutorial I would like to see what you make some come join my Facebook group Hannah’s Creative Nest where you can share what you have make.
More to come in 2024
- Suite of the month -Turtle- Awesome Suite
- New Stampin’ Up! Reward Programme
- Sale A-Bration is nearly over
- Heartfelt Hexagon – Simple cards
- Time for Sale -A-Bration
-
Easy cards using the Cheerful Daisies suite
Hello everyone and welcome to another blog post this month I have been playing with […]
Hello everyone and welcome to another blog post this month I have been playing with the cheerful daisies suite .
In this suite you can get the stamps,dies the Designer series paper
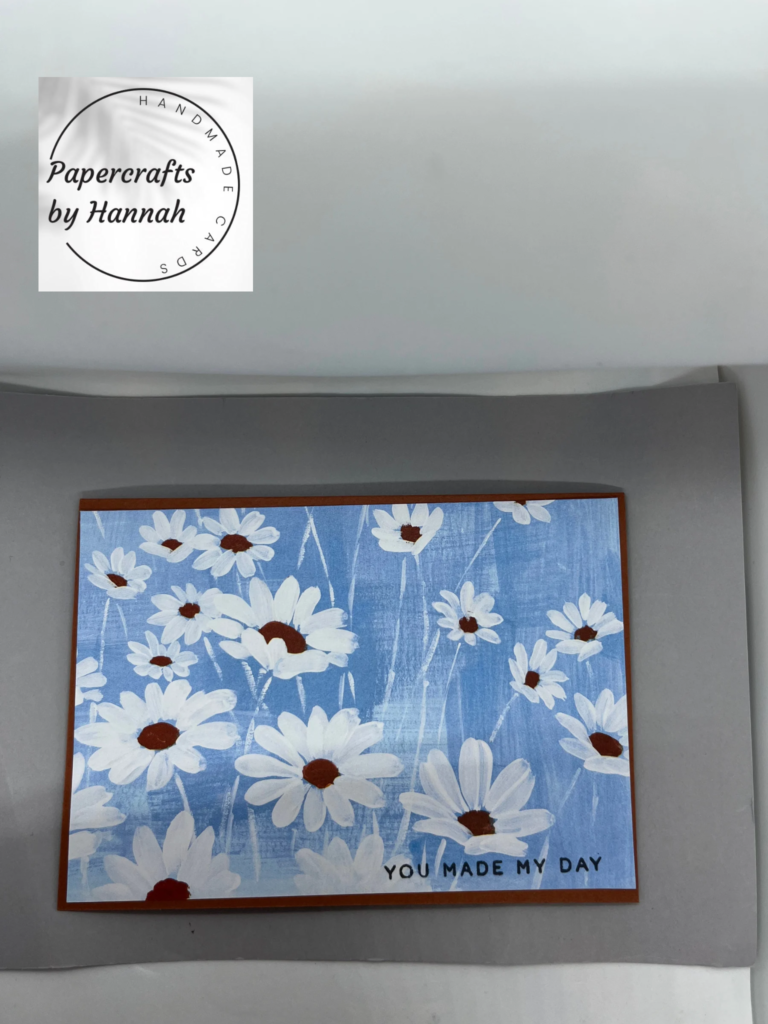
The first card i used Cooper clay card base cut at 14.9cm and score at 10.5cm I then cut the DSP at 14.4cm x 10cm and then i stamped the sentiment in Memento.
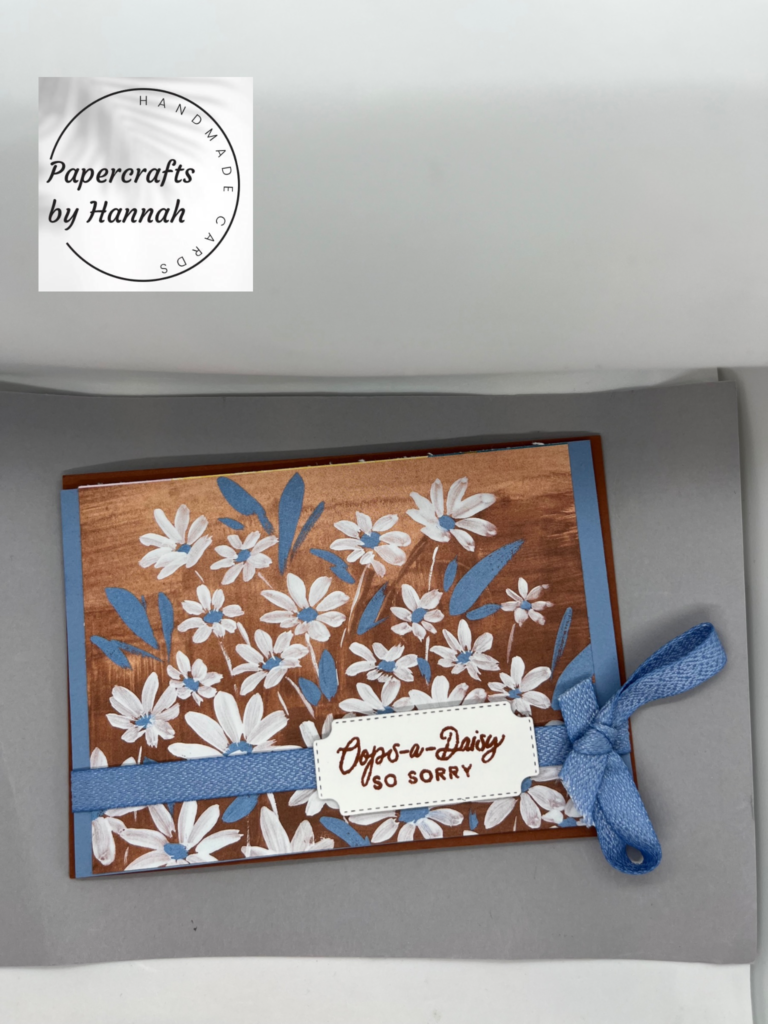
The next card i made was using the cooper clay card base cat at 14.9 and then score at 10.5cm. the next layer i used the Boho blue card stock cut aat 10cmx14.4cm and then cut the DSP at 13.9×9.5 i stamped the writing in copper clay and then cut the ssentment banner using the coordinating dies . i also used the boho ribbon which i put a bow to one side.
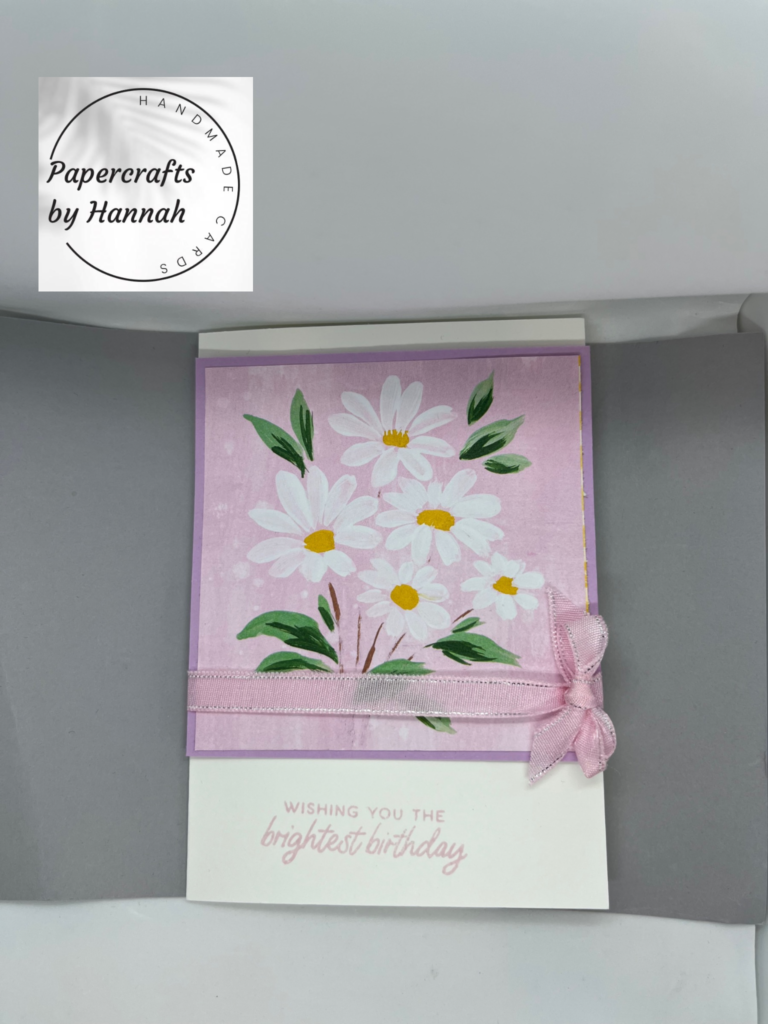
The next card i made using basic white which i cut at 14.9ccm and scored at 10.5cm .I then cut the fresh fressia card and then cut the dsp and glued to the front of the card i then stamped the sentiment in fresh fressia .
Here is 1 other card i made and a book which i have also made .
Huge crafty hug
- Suite of the month -Turtle- Awesome Suite
- New Stampin’ Up! Reward Programme
- Sale A-Bration is nearly over
- Heartfelt Hexagon – Simple cards
- Time for Sale -A-Bration
-
-
-
Suite of the month -Turtle- Awesome Suite
Every Month I will now be Doing a suite of the month where I will […]
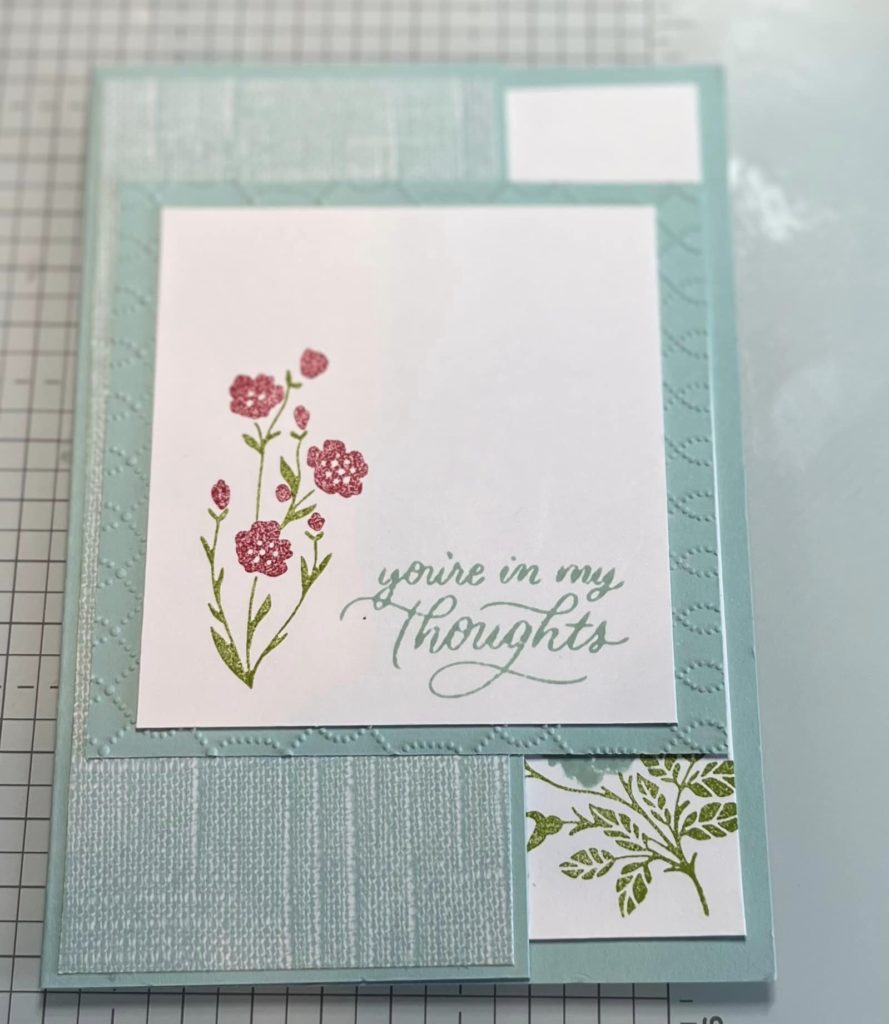
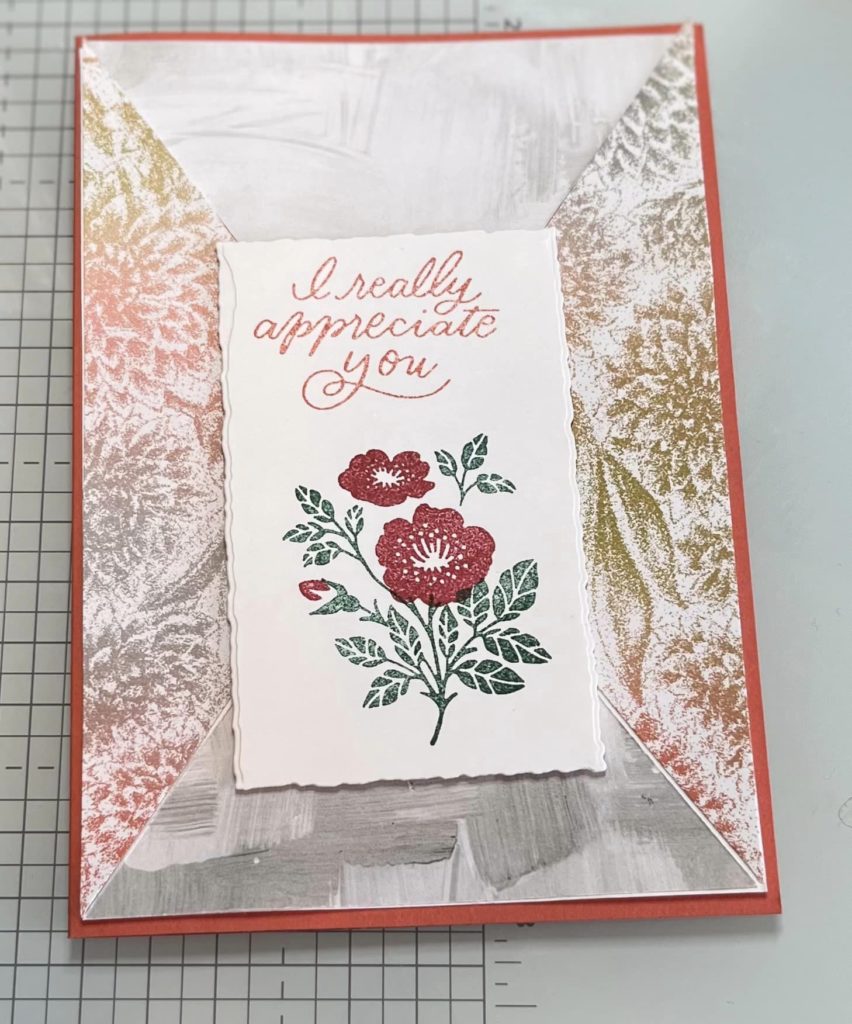
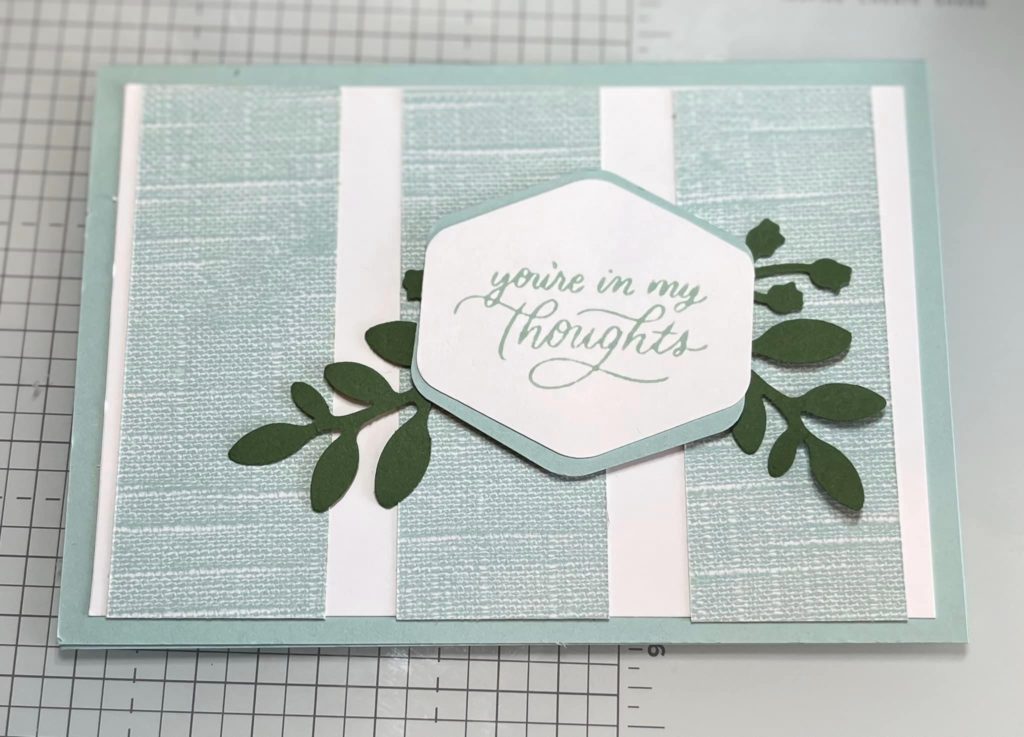
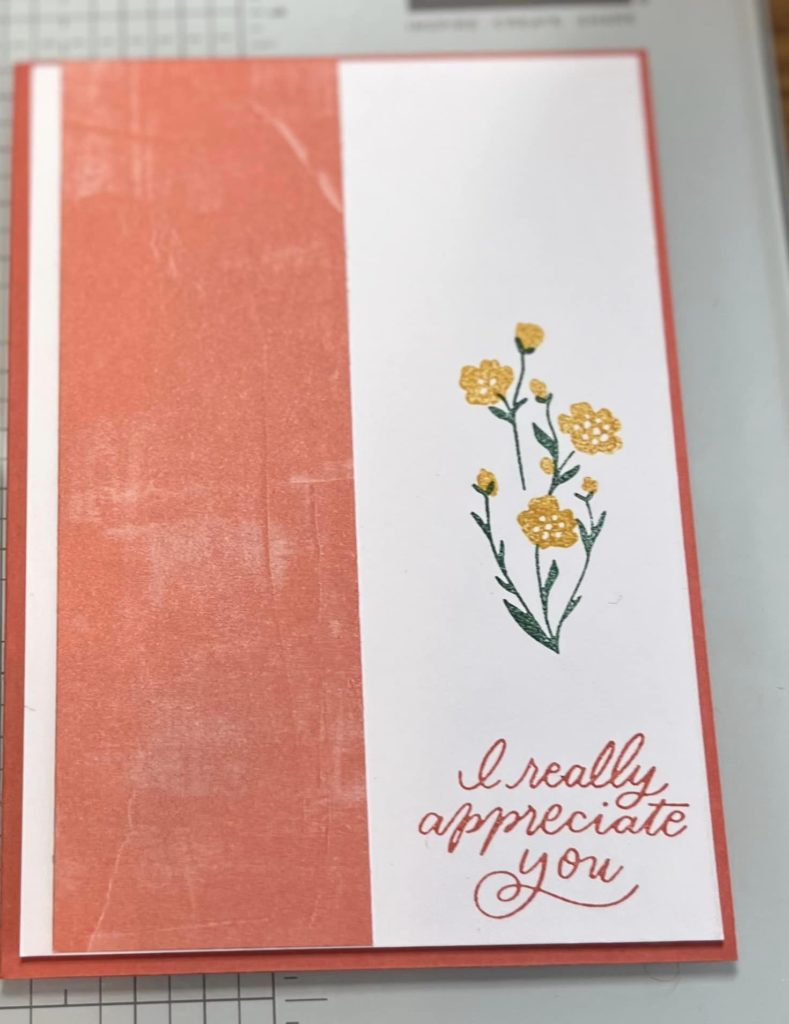
Every Month I will now be Doing a suite of the month where I will share 4 or more cards on how to do different techniques using the suite . This month suite is the Turtle-y Cute suite .
In this suite you will get:
Turtle-y awesome Stamp stamp set
Turtle-y Awesome Dies
Turtle Texture Embossing
Shades of green hexagons
Turtle-y cute 12 X 12 DSP
You can can get this suite using the code 165235 or you can get them all separate .
I have created 4 cards and a PDF to go along with it where you be able to download and able to use to make the cards all I ask is that you do not Sell the tutorial on or copy and claim the tutorial as your own.
Grab your PDF here
I have done some techniques doing die cutting , Masking and blending brushes along with Embossing and standard cutting .
I have attached the YouTube video below as well but also check out my YouTube for more cards using this suite as well.
Here are the cards using this suite for you all to see
Thank you for reading please feel free to leave a comment . See you next time on another blog
- Suite of the month -Turtle- Awesome Suite
- New Stampin’ Up! Reward Programme
- Sale A-Bration is nearly over
- Heartfelt Hexagon – Simple cards
- Time for Sale -A-Bration
-
New Stampin’ Up! Reward Programme
Shopping at stampin’ Up! Have got a little bit more rewarding Because you as customers […]
Shopping at stampin’ Up! Have got a little bit more rewarding Because you as customers can now earn even more rewards for shopping with me . You will earn rewards everytime you shop which you can save and if there is a big product you would like you can use the rewards on that or use them here and there on little items .
The way it works is
Shop- Create a Stampin’ Up! account, opt in to Stampin’ Rewards, and start shopping!
Earn- For every online order over £20*, you’ll earn 10% of your entire order in Stampin’ Rewards!
Redeem-Redeem your rewards and save BIG!
Here are some Frequently asked questions
- What is the Stampin’ Rewards programme?
- The Stampin’ Rewards programme is a way for you to earn rewards when you shop on the Stampin’ Up! website. You can use these rewards to redeem Stampin’ Up! products.
- How does the Stampin’ Rewards programme work?
- If you want to participate in the programme, you must sign up for a Stampin’ Up! online account. For every online order over £20, you’ll earn 10% of your entire order* in Stampin’ Rewards. You can view your rewards in your Stampin’ Rewards Dashboard, and you can redeem your rewards for products on the Stampin’ Up! website.
Check out the Video below from the CEO sara Douglas to find out more .
- Suite of the month -Turtle- Awesome Suite
- New Stampin’ Up! Reward Programme
- Sale A-Bration is nearly over
- Heartfelt Hexagon – Simple cards
- Time for Sale -A-Bration
-
Sale A-Bration is nearly over
Hello Everyone and welcome to another blog post .We are a few days a away […]
Hello Everyone and welcome to another blog post .We are a few days a away of sale a0bration of being over so i thought I would like to share you a card i used with manly just sale a-bration items minus card stock and colouring tools,
This card i created using basic white thick cardstock with azure afternoon and sunny days DSP. I cut of 3cm to make them look like clouds in the sky. I stamped the animals using jungle pals From the SALE-A-BRATION catalogue which also coordinate with the dies with i died cut the animals and the tree in pecan pie and the leaf in garden green.
There is lots of other products you can get free until 29th February 2024 at 10:59. There also a chance to join my team and get extra products in your starter kit or get a free glass mat and accessories.
shop any products by going to my shop and using the code CW4FGD6D to get a free tutorial sent to your inbox.
Thank you for reading please feel free to get hold of me for any questions you may have.
- Suite of the month -Turtle- Awesome Suite
- New Stampin’ Up! Reward Programme
- Sale A-Bration is nearly over
- Heartfelt Hexagon – Simple cards
- Time for Sale -A-Bration
-
Heartfelt Hexagon – Simple cards
Hello and welcome to another blog post for January and the very last one of […]
Hello and welcome to another blog post for January and the very last one of the month . This week we will be looking at the heartfelt hexagon stamp set and also the Heartfelt Hello which is a Sale-A-Bration stamp set and the punch.
The first card i created was using the Basic white note cards .I made 3 the same but with different sentiments and colors which coordinate with the DSP . The DSP I have used is the inked botanicals 6×6 paper.
I stamped the Hello , Enjoy your day and happy Mothers day in memento on basic white and then punched out using the hexagon punch . I then punched out a crushed curry , lost lagoon and pool party card using the hexagon punched and cat the colored pieces in half and stuck it to the back of the white hexagon so it over lapse.
I then cut the dsp at 3 cm x 12.7 and 4 cm x 12.7 and 4.5 cm x 12.7 and stuck to the left side of the card near the fold . I then attached the basic white sentiments with the colored edging using the dimensional .
The next card i created with Basic white thick for the card base and berry burst for the second layer and the Birthday balloon spotty DSP as the third . I then punched out a hexagon in berry burst and stamp the basic white in berry burst outer border and the words in azure afternoon. I cut the berry bust card in half and attach to the back of the basic white.
My final card i created was using real red for the base a fresh freesia dsp and basic white card stock . I first punched out the hexagon and placed it on the basic white and using the blending brushes and the ink pad i made the background in Real red and fresh freesia and stamped the leave in the middle on basic black .
I then punched out a real red hexagon and stamped the border in fresh freesia and the words in real red. I then punched out and cut the real red card in half and stuck to the back to leave a little bit sticking out.
Thank you for reading i hope you enjoyed if you want to order from me dont forget to go to my store.
- Suite of the month -Turtle- Awesome Suite
- New Stampin’ Up! Reward Programme
- Sale A-Bration is nearly over
- Heartfelt Hexagon – Simple cards
- Time for Sale -A-Bration
-
Time for Sale -A-Bration
Hello Everyone and welcome to another Blog this week we will be looking at some […]
Hello Everyone and welcome to another Blog this week we will be looking at some Sale-a-bration items which is using the softly stripped dsp and the softy sophisticated stamp set and the coordinating Embossing folder.
The first card I made was using the pool party card stock and cut 3 cm off the side once scored at 10.5 . I cut a 9 x 9 cm pool part and embossed it using the coordinating embossing folder. I cut the basic white at 8.5 cm x 8.5 cm and stamped the worlds in pool party and the flowers in garden green and real red. I cut the dsp at 6.5cm x 13.9 cm and attach all together .
The second cards I made using the Calypso Coral card base ,Basic White and the DSP which i cut diagonally both ways and turned 2 of the Pieces over, I then stamped the words in calypso coral and the flower in Garden Green and Real Red and die cut using the postage dies .
The next 2 cards are examples that of 2 that I Made on my video which i have attached to the bottom of the page but in different colors but same layout.
Thank you very much for reading I hope you enjoyed don’t forgot if you would like to order go to my shop and order using the host code.
- Suite of the month -Turtle- Awesome Suite
- New Stampin’ Up! Reward Programme
- Sale A-Bration is nearly over
- Heartfelt Hexagon – Simple cards
- Time for Sale -A-Bration
-
Tech 4 Stampers BlogHop – Lets Celebrate
Good evening and Happy Tuesday and welcome to this month Tech 4 stampers academy Blog […]
Good evening and Happy Tuesday and welcome to this month Tech 4 stampers academy Blog hop and the theme this month is Celebrate so i have crated a few cards using Circle sayings celebrate stamp and punch Birthday balloons stamps and dies.
My first card
I created this card Using bright and beutiful dsp
Instructions
- Cut the Misty Moonlight card base at 20 x 14.9cm and score at 10.5
- Cut the Blueberry Bushell layer at 14.4cm x 10cm
- Cut the DSP 6X 14.4
- Cut the Vellum at 9×9 cm
- die cut the starts using the bright and beautiful dies and the tag from the same dies
- stamp the sentiment in Misrty moonlight and attach the card together .
This is My second Card is using the note cards as the base .
Thank you for taking the time to read if you would like to order then please feel free to contact me or go to my shop to order and if you order from you will get a free tutorial that has ideas from many people around the world .
- Suite of the month -Turtle- Awesome Suite
- New Stampin’ Up! Reward Programme
- Sale A-Bration is nearly over
- Heartfelt Hexagon – Simple cards
- Time for Sale -A-Bration
-
Out now
I am So excited to announce the new January – April Mini catalog is now […]
I am So excited to announce the new January – April Mini catalog is now out for you all to shop from
You can shop from me by going to my store https://www.stampinup.uk/?demoid=5016326
and using the host code BSCHQFEE
You can shop and earn free products if you spend £45 or £90 which you can get in the Sale A- Bration . You can also Host a party and earn free products when you order and also join my team as well and grab your self some extra product of the stamping glass mat and accessories
Here a sneak peak at the glass mat for you all and some information on it
The Stampin’ Glass Mat Studio is a paper crafter’s dream! The heavy-duty glass mat comes printed with a ruler and grid lines for easy measuring, while the large surface space gives ample room for spreading out while paper crafting. The safety-tempered glass has a heat and scratch resistant surface that wipes clean with the included cloth and water—no chemicals needed. The reusable cloth also cleans ink off your stamps! The nonslip, heat resistant, waterproof silicone mat features four palette squares for mixing custom ink colours or for holding small ink spots in place while crafting. Each component can be used separately or you can use all three items together for a multipurpose paper crafting studio that’s both functional and elegant.
The glass mat studio includes the glass mat which 5mm thick , Heat and screatch resistant And you can clean it with water or alcohol to keep it clean
There a silcone mat included which can stick to the mat and perfect for watercolor holding the mini ink that you get with the kits waterproof and heat resistant
It also comes with a cleaning cloth which is durable and reusable and perfect for cleaning stamps and surfacing with just water .
so if you like to get a chance of grabbing on then join my team by using this link https://www.stampinup.uk/join?demoid=5016326
But don’t forget the annual catalogue is out now which you can also buy from aswell.
If you have any questions then please feel free to contact me and I will be happy to answer any questions that i can
- Suite of the month -Turtle- Awesome Suite
- New Stampin’ Up! Reward Programme
- Sale A-Bration is nearly over
- Heartfelt Hexagon – Simple cards
- Time for Sale -A-Bration
-
Bee My Valentines – Simple cards using Bees
Hello and welcome to another Blog post I know it has been a while I […]
Hello and welcome to another Blog post I know it has been a while I will get more frequent at doing theses . This week we will be looking at the Bee my Valentines suite and in this suite we have a Stamp set and with a punch , Designer series paper also known as DSP ,Some Sweet Sorbet Ribbon ,some adhesive hearts and flowers and square pillow boxes.
My first card I have cased a catalogue The card stock I used was Crushed Curry and crushed curry ink . I then stamped the bee on Crushed curry using memento and then punched the bee out and the wings in memento and used the punch to punch the wings . and then glued it all together
I then Used the Square pillow box which I decorated using pool party and daffodil delight ink and then stamped the bee and punched out.
My Next card i made using the Be mine 12×12 DSP and some basic white card stock I cut the DSP at 14.9 x 10.5 and covered and the basic white dsp at 13.9 x 9.5 cm and stamped the be using crushed curry and memento with balmy blue wings and Real Red wings and stamping 2 red hearts and add then flower adhesive backed gems.
The last cards I made was using the largest circle dies and folded in half and then the 3 smallest from the largest circle and cut in half and .I stamped the bee in Crushed curry and memento and stuck on the card before adding sentiment using the
The next 2 cards I created at Onstage a demo only event using the suite .
The last card i made using the note cards and enveloped and just copied a card i made and showed you how to make a little further up on this post .
These are the photo i made on my video
Thank you for taking the time to read about this suite and if you would like to order then please feel free to contact me or go to my shop to order and if you order from you will get a free tutorial that has ideas from many people around the world .
- Suite of the month -Turtle- Awesome Suite
- New Stampin’ Up! Reward Programme
- Sale A-Bration is nearly over
- Heartfelt Hexagon – Simple cards
- Time for Sale -A-Bration
-
Happy New year – Great news
Happy New Year Everyone I hope you had a wonderful start to the new year […]
Happy New Year Everyone I hope you had a wonderful start to the new year . I thought I would let you know of some changes Happening in 2024 with Papercraftsbyhannah . The first is For the next year i will be taking part in a Tutorial Bundle where I have Collaborated with 10 Other demonstrators from around the United Kingdom , Australia and United states. This tutorial is free with any Order you have placed
You can grab your Free tutorial with all 11 in by Placing an order with me and using the Host code BSCHQFFE. January Theme is Hello So why not Make an order to check out all the amazing projects. There will be a new tutorial every month .
When you have ordered and recieved the tutorial I would like to see what you make some come join my Facebook group Hannah’s Creative Nest where you can share what you have make.
More to come in 2024
- Suite of the month -Turtle- Awesome Suite
- New Stampin’ Up! Reward Programme
- Sale A-Bration is nearly over
- Heartfelt Hexagon – Simple cards
- Time for Sale -A-Bration
-
Easy cards using the Cheerful Daisies suite
Hello everyone and welcome to another blog post this month I have been playing with […]
Hello everyone and welcome to another blog post this month I have been playing with the cheerful daisies suite .
In this suite you can get the stamps,dies the Designer series paper
The first card i used Cooper clay card base cut at 14.9cm and score at 10.5cm I then cut the DSP at 14.4cm x 10cm and then i stamped the sentiment in Memento.
The next card i made was using the cooper clay card base cat at 14.9 and then score at 10.5cm. the next layer i used the Boho blue card stock cut aat 10cmx14.4cm and then cut the DSP at 13.9×9.5 i stamped the writing in copper clay and then cut the ssentment banner using the coordinating dies . i also used the boho ribbon which i put a bow to one side.
The next card i made using basic white which i cut at 14.9ccm and scored at 10.5cm .I then cut the fresh fressia card and then cut the dsp and glued to the front of the card i then stamped the sentiment in fresh fressia .
Here is 1 other card i made and a book which i have also made .
Huge crafty hug
- Suite of the month -Turtle- Awesome Suite
- New Stampin’ Up! Reward Programme
- Sale A-Bration is nearly over
- Heartfelt Hexagon – Simple cards
- Time for Sale -A-Bration
-
-
-
Suite of the month -Turtle- Awesome Suite
Every Month I will now be Doing a suite of the month where I will […]
Every Month I will now be Doing a suite of the month where I will share 4 or more cards on how to do different techniques using the suite . This month suite is the Turtle-y Cute suite .
In this suite you will get:
Turtle-y awesome Stamp stamp set
Turtle-y Awesome Dies
Turtle Texture Embossing
Shades of green hexagons
Turtle-y cute 12 X 12 DSP
You can can get this suite using the code 165235 or you can get them all separate .
I have created 4 cards and a PDF to go along with it where you be able to download and able to use to make the cards all I ask is that you do not Sell the tutorial on or copy and claim the tutorial as your own.
Grab your PDF here
I have done some techniques doing die cutting , Masking and blending brushes along with Embossing and standard cutting .
I have attached the YouTube video below as well but also check out my YouTube for more cards using this suite as well.
Here are the cards using this suite for you all to see
Thank you for reading please feel free to leave a comment . See you next time on another blog
- Suite of the month -Turtle- Awesome Suite
- New Stampin’ Up! Reward Programme
- Sale A-Bration is nearly over
- Heartfelt Hexagon – Simple cards
- Time for Sale -A-Bration
-
New Stampin’ Up! Reward Programme
Shopping at stampin’ Up! Have got a little bit more rewarding Because you as customers […]
Shopping at stampin’ Up! Have got a little bit more rewarding Because you as customers can now earn even more rewards for shopping with me . You will earn rewards everytime you shop which you can save and if there is a big product you would like you can use the rewards on that or use them here and there on little items .
The way it works is
Shop- Create a Stampin’ Up! account, opt in to Stampin’ Rewards, and start shopping!
Earn- For every online order over £20*, you’ll earn 10% of your entire order in Stampin’ Rewards!
Redeem-Redeem your rewards and save BIG!
Here are some Frequently asked questions
- What is the Stampin’ Rewards programme?
- The Stampin’ Rewards programme is a way for you to earn rewards when you shop on the Stampin’ Up! website. You can use these rewards to redeem Stampin’ Up! products.
- How does the Stampin’ Rewards programme work?
- If you want to participate in the programme, you must sign up for a Stampin’ Up! online account. For every online order over £20, you’ll earn 10% of your entire order* in Stampin’ Rewards. You can view your rewards in your Stampin’ Rewards Dashboard, and you can redeem your rewards for products on the Stampin’ Up! website.
Check out the Video below from the CEO sara Douglas to find out more .
- Suite of the month -Turtle- Awesome Suite
- New Stampin’ Up! Reward Programme
- Sale A-Bration is nearly over
- Heartfelt Hexagon – Simple cards
- Time for Sale -A-Bration
-
Sale A-Bration is nearly over
Hello Everyone and welcome to another blog post .We are a few days a away […]
Hello Everyone and welcome to another blog post .We are a few days a away of sale a0bration of being over so i thought I would like to share you a card i used with manly just sale a-bration items minus card stock and colouring tools,
This card i created using basic white thick cardstock with azure afternoon and sunny days DSP. I cut of 3cm to make them look like clouds in the sky. I stamped the animals using jungle pals From the SALE-A-BRATION catalogue which also coordinate with the dies with i died cut the animals and the tree in pecan pie and the leaf in garden green.
There is lots of other products you can get free until 29th February 2024 at 10:59. There also a chance to join my team and get extra products in your starter kit or get a free glass mat and accessories.
shop any products by going to my shop and using the code CW4FGD6D to get a free tutorial sent to your inbox.
Thank you for reading please feel free to get hold of me for any questions you may have.
- Suite of the month -Turtle- Awesome Suite
- New Stampin’ Up! Reward Programme
- Sale A-Bration is nearly over
- Heartfelt Hexagon – Simple cards
- Time for Sale -A-Bration
-
Heartfelt Hexagon – Simple cards
Hello and welcome to another blog post for January and the very last one of […]
Hello and welcome to another blog post for January and the very last one of the month . This week we will be looking at the heartfelt hexagon stamp set and also the Heartfelt Hello which is a Sale-A-Bration stamp set and the punch.
The first card i created was using the Basic white note cards .I made 3 the same but with different sentiments and colors which coordinate with the DSP . The DSP I have used is the inked botanicals 6×6 paper.
I stamped the Hello , Enjoy your day and happy Mothers day in memento on basic white and then punched out using the hexagon punch . I then punched out a crushed curry , lost lagoon and pool party card using the hexagon punched and cat the colored pieces in half and stuck it to the back of the white hexagon so it over lapse.
I then cut the dsp at 3 cm x 12.7 and 4 cm x 12.7 and 4.5 cm x 12.7 and stuck to the left side of the card near the fold . I then attached the basic white sentiments with the colored edging using the dimensional .
The next card i created with Basic white thick for the card base and berry burst for the second layer and the Birthday balloon spotty DSP as the third . I then punched out a hexagon in berry burst and stamp the basic white in berry burst outer border and the words in azure afternoon. I cut the berry bust card in half and attach to the back of the basic white.
My final card i created was using real red for the base a fresh freesia dsp and basic white card stock . I first punched out the hexagon and placed it on the basic white and using the blending brushes and the ink pad i made the background in Real red and fresh freesia and stamped the leave in the middle on basic black .
I then punched out a real red hexagon and stamped the border in fresh freesia and the words in real red. I then punched out and cut the real red card in half and stuck to the back to leave a little bit sticking out.
Thank you for reading i hope you enjoyed if you want to order from me dont forget to go to my store.
- Suite of the month -Turtle- Awesome Suite
- New Stampin’ Up! Reward Programme
- Sale A-Bration is nearly over
- Heartfelt Hexagon – Simple cards
- Time for Sale -A-Bration
-
Time for Sale -A-Bration
Hello Everyone and welcome to another Blog this week we will be looking at some […]
Hello Everyone and welcome to another Blog this week we will be looking at some Sale-a-bration items which is using the softly stripped dsp and the softy sophisticated stamp set and the coordinating Embossing folder.
The first card I made was using the pool party card stock and cut 3 cm off the side once scored at 10.5 . I cut a 9 x 9 cm pool part and embossed it using the coordinating embossing folder. I cut the basic white at 8.5 cm x 8.5 cm and stamped the worlds in pool party and the flowers in garden green and real red. I cut the dsp at 6.5cm x 13.9 cm and attach all together .
The second cards I made using the Calypso Coral card base ,Basic White and the DSP which i cut diagonally both ways and turned 2 of the Pieces over, I then stamped the words in calypso coral and the flower in Garden Green and Real Red and die cut using the postage dies .
The next 2 cards are examples that of 2 that I Made on my video which i have attached to the bottom of the page but in different colors but same layout.
Thank you very much for reading I hope you enjoyed don’t forgot if you would like to order go to my shop and order using the host code.
- Suite of the month -Turtle- Awesome Suite
- New Stampin’ Up! Reward Programme
- Sale A-Bration is nearly over
- Heartfelt Hexagon – Simple cards
- Time for Sale -A-Bration
-
Tech 4 Stampers BlogHop – Lets Celebrate
Good evening and Happy Tuesday and welcome to this month Tech 4 stampers academy Blog […]
Good evening and Happy Tuesday and welcome to this month Tech 4 stampers academy Blog hop and the theme this month is Celebrate so i have crated a few cards using Circle sayings celebrate stamp and punch Birthday balloons stamps and dies.
My first card
I created this card Using bright and beutiful dsp
Instructions
- Cut the Misty Moonlight card base at 20 x 14.9cm and score at 10.5
- Cut the Blueberry Bushell layer at 14.4cm x 10cm
- Cut the DSP 6X 14.4
- Cut the Vellum at 9×9 cm
- die cut the starts using the bright and beautiful dies and the tag from the same dies
- stamp the sentiment in Misrty moonlight and attach the card together .
This is My second Card is using the note cards as the base .
Thank you for taking the time to read if you would like to order then please feel free to contact me or go to my shop to order and if you order from you will get a free tutorial that has ideas from many people around the world .
- Suite of the month -Turtle- Awesome Suite
- New Stampin’ Up! Reward Programme
- Sale A-Bration is nearly over
- Heartfelt Hexagon – Simple cards
- Time for Sale -A-Bration
-
Out now
I am So excited to announce the new January – April Mini catalog is now […]
I am So excited to announce the new January – April Mini catalog is now out for you all to shop from
You can shop from me by going to my store https://www.stampinup.uk/?demoid=5016326
and using the host code BSCHQFEE
You can shop and earn free products if you spend £45 or £90 which you can get in the Sale A- Bration . You can also Host a party and earn free products when you order and also join my team as well and grab your self some extra product of the stamping glass mat and accessories
Here a sneak peak at the glass mat for you all and some information on it
The Stampin’ Glass Mat Studio is a paper crafter’s dream! The heavy-duty glass mat comes printed with a ruler and grid lines for easy measuring, while the large surface space gives ample room for spreading out while paper crafting. The safety-tempered glass has a heat and scratch resistant surface that wipes clean with the included cloth and water—no chemicals needed. The reusable cloth also cleans ink off your stamps! The nonslip, heat resistant, waterproof silicone mat features four palette squares for mixing custom ink colours or for holding small ink spots in place while crafting. Each component can be used separately or you can use all three items together for a multipurpose paper crafting studio that’s both functional and elegant.
The glass mat studio includes the glass mat which 5mm thick , Heat and screatch resistant And you can clean it with water or alcohol to keep it clean
There a silcone mat included which can stick to the mat and perfect for watercolor holding the mini ink that you get with the kits waterproof and heat resistant
It also comes with a cleaning cloth which is durable and reusable and perfect for cleaning stamps and surfacing with just water .
so if you like to get a chance of grabbing on then join my team by using this link https://www.stampinup.uk/join?demoid=5016326
But don’t forget the annual catalogue is out now which you can also buy from aswell.
If you have any questions then please feel free to contact me and I will be happy to answer any questions that i can
- Suite of the month -Turtle- Awesome Suite
- New Stampin’ Up! Reward Programme
- Sale A-Bration is nearly over
- Heartfelt Hexagon – Simple cards
- Time for Sale -A-Bration
-
Bee My Valentines – Simple cards using Bees
Hello and welcome to another Blog post I know it has been a while I […]
Hello and welcome to another Blog post I know it has been a while I will get more frequent at doing theses . This week we will be looking at the Bee my Valentines suite and in this suite we have a Stamp set and with a punch , Designer series paper also known as DSP ,Some Sweet Sorbet Ribbon ,some adhesive hearts and flowers and square pillow boxes.
My first card I have cased a catalogue The card stock I used was Crushed Curry and crushed curry ink . I then stamped the bee on Crushed curry using memento and then punched the bee out and the wings in memento and used the punch to punch the wings . and then glued it all together
I then Used the Square pillow box which I decorated using pool party and daffodil delight ink and then stamped the bee and punched out.
My Next card i made using the Be mine 12×12 DSP and some basic white card stock I cut the DSP at 14.9 x 10.5 and covered and the basic white dsp at 13.9 x 9.5 cm and stamped the be using crushed curry and memento with balmy blue wings and Real Red wings and stamping 2 red hearts and add then flower adhesive backed gems.
The last cards I made was using the largest circle dies and folded in half and then the 3 smallest from the largest circle and cut in half and .I stamped the bee in Crushed curry and memento and stuck on the card before adding sentiment using the
The next 2 cards I created at Onstage a demo only event using the suite .
The last card i made using the note cards and enveloped and just copied a card i made and showed you how to make a little further up on this post .
These are the photo i made on my video
Thank you for taking the time to read about this suite and if you would like to order then please feel free to contact me or go to my shop to order and if you order from you will get a free tutorial that has ideas from many people around the world .
- Suite of the month -Turtle- Awesome Suite
- New Stampin’ Up! Reward Programme
- Sale A-Bration is nearly over
- Heartfelt Hexagon – Simple cards
- Time for Sale -A-Bration
-
Happy New year – Great news
Happy New Year Everyone I hope you had a wonderful start to the new year […]
Happy New Year Everyone I hope you had a wonderful start to the new year . I thought I would let you know of some changes Happening in 2024 with Papercraftsbyhannah . The first is For the next year i will be taking part in a Tutorial Bundle where I have Collaborated with 10 Other demonstrators from around the United Kingdom , Australia and United states. This tutorial is free with any Order you have placed
You can grab your Free tutorial with all 11 in by Placing an order with me and using the Host code BSCHQFFE. January Theme is Hello So why not Make an order to check out all the amazing projects. There will be a new tutorial every month .
When you have ordered and recieved the tutorial I would like to see what you make some come join my Facebook group Hannah’s Creative Nest where you can share what you have make.
More to come in 2024
- Suite of the month -Turtle- Awesome Suite
- New Stampin’ Up! Reward Programme
- Sale A-Bration is nearly over
- Heartfelt Hexagon – Simple cards
- Time for Sale -A-Bration
-
Easy cards using the Cheerful Daisies suite
Hello everyone and welcome to another blog post this month I have been playing with […]
Hello everyone and welcome to another blog post this month I have been playing with the cheerful daisies suite .
In this suite you can get the stamps,dies the Designer series paper
The first card i used Cooper clay card base cut at 14.9cm and score at 10.5cm I then cut the DSP at 14.4cm x 10cm and then i stamped the sentiment in Memento.
The next card i made was using the cooper clay card base cat at 14.9 and then score at 10.5cm. the next layer i used the Boho blue card stock cut aat 10cmx14.4cm and then cut the DSP at 13.9×9.5 i stamped the writing in copper clay and then cut the ssentment banner using the coordinating dies . i also used the boho ribbon which i put a bow to one side.
The next card i made using basic white which i cut at 14.9ccm and scored at 10.5cm .I then cut the fresh fressia card and then cut the dsp and glued to the front of the card i then stamped the sentiment in fresh fressia .
Here is 1 other card i made and a book which i have also made .
Huge crafty hug
- Suite of the month -Turtle- Awesome Suite
- New Stampin’ Up! Reward Programme
- Sale A-Bration is nearly over
- Heartfelt Hexagon – Simple cards
- Time for Sale -A-Bration
-
